Baguio Trip Basics: How to do what you want to do in the City of Pines

Much has been said and written about what to do during a sojourn to Baguio City. From the places to visit, food to eat and stuff to buy, it really is a challenge to be able to tick off all the stuff in your Baguio itinerary. So for this post, I’ll focus on the how, the strategies you can use to make the most out of your trip.

During the fam’s recent trip to the City of Pines, we discovered that, as with most things, especially travelling, planning is key:

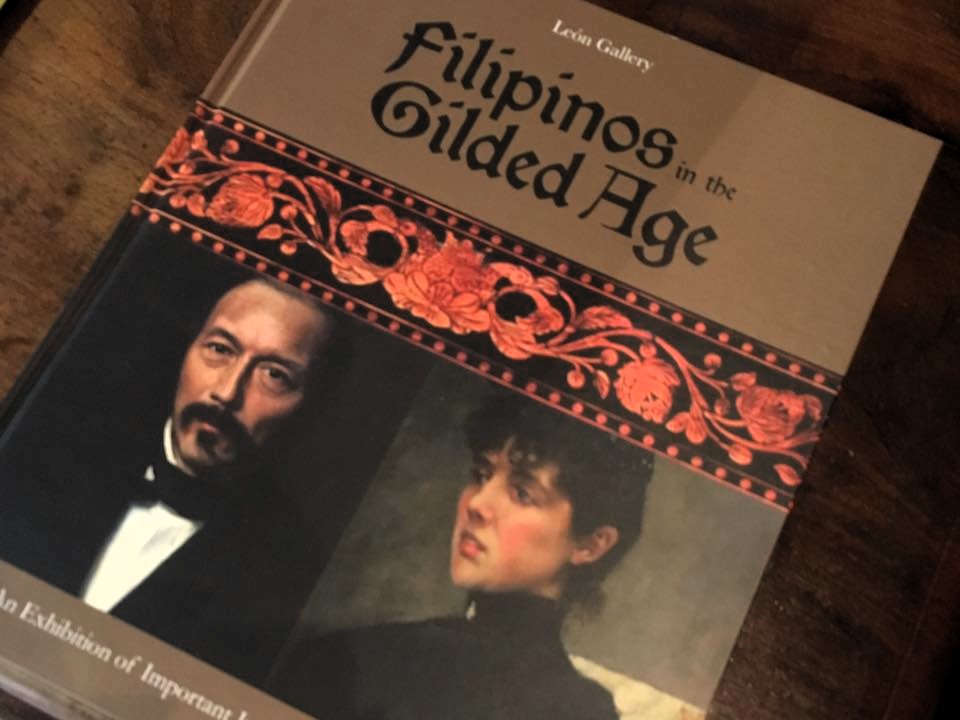
Know your priorities. For example, prior to setting out for this trip, we determined that the highlight for this trip is a visit to the BenCab Museum. With this as a priority, we were able to carve out most of our second day for this activity: from eating breakfast at the Cafe Sabel within the museum’s grounds, exploring the museum’s galleries, even getting notebooks that feature BenCab’s artworks from the souvenir shop.

Stay in the center of the action. It’s a good thing that the place where my family stayed during our vacay – Summerlin Appartelle, available on AirBnB – is conveniently located along Gibraltar Road: a stone’s throw away from The Good Shepherd Convent (where we shopped for pasalubongs for the folks back home including that famous Ube Jam!), and a short drive away from the Mansion House (where bought raisin breads that rival those from Baguio Country Club) and from Korean Palace (where we planned on pigging out on samgyeopsal and other Korean food favorites). Happily, the appartelle is also just on the adjacent street to where Amare La Cucina is located; this is where we met some of our relatives to catch up over some Baguio’s famously yummy brick oven pizzas. Also, with the traffic congestion and lack of parking spaces in the city, you might want to consider leaving the car where you’re staying and just taking a cab to where you want to go; fortunately, ride-hailing apps like Micab and Grab are already operational in Baguio.

(Not yet on AirBNB? Sign up using my link to get Php1,600 in travel credit.)

Leave some room for the Baguio must-dos. Things like shopping for walis tambo and eating strawberry taho at the Camp 7’s Pasalubong Center along Kennon Road as we were leaving Baguio rounded up the family’s Baguio experience.

Do you have tried-and-tested travel tips? Do share them in the comments!

Got the wanderlust? Check out these books on Amazon.com!

Love books and reading? Try Kindle Unlimited on Amazon. Get your first month FREE.

No Kindle device? Download the Kindle App for FREE to read your favorite books anytime and anywhere.

No time to read? Listen to your favorite books instead while you drive, run, shop, and more.  Try Audible for free for 30 days and get two free audiobooks.

Recipe: Lava Cake in Less than 5 Minutes

I got myself a pair of Hershey’s Lava Cake Makers from Gourdo’s a couple of months back.

These nifty plastic mugs enable you to make mug cakes using your microwave oven. They even come with lids so you can have your mug cakes on the go.

Imagine the possibilities:

  • Whenever you have craving for sweets, you can easily whip up a dessert
  • You can teach your kids how to make their own sweet snacks in a fun, fast and easy way
  • You can have something to serve to unexpected guests in a matter of minutes

The packages come with 2 lava cake recipe options: one using the cake mix from Hershey’s and one from scratch. Since I have the ingredients readily available, I decided to make the lava cakes from scratch. I wrote down the recipe as I thought I might lose the hardcopy (and I did!). This recipe yields 2 yummy mug cakes, great for sharing!

Ingredients:

  • 2 tbsp vegetable oil
  • 1/4 cup milk
  • 1 large egg
  • 1/2 tsp vanilla extract
  • 1/3 cup all purpose flour
  • 1/2 cup sugar
  • 2 tbsp cocoa
  • 1/2 cup semi-sweet chocolate chips

Procedure:

  1. In a small bowl, whisk together vegetable oil, milk and vanilla. Add the flour, sugar and cocoa and whisk to combine.
  2. To make 1 lava cake: place 1/8 cup semi-sweet chocolate chips at the bottom of the mug, then pour in 1/4 of the batter to cover the chocolate chips. Place another 1/8 cup of chocolate chips then cover them with 1/4 of the batter.
  3. Microwave on HIGH for 90 secs or until cake is fluffy.
  4. Repeat steps 2 and 3 to make the second mug cake.

Enjoy the lava cakes while they’re still warm! You can add a few dollops of vanilla ice cream as an extra treat.

If you have trouble finding the Hersheys Lava Cake Makers in local stores, you can order them from Amazon.com.

Want to try this recipe today? There’s no need to leave home to shop for ingredients.  With Honestbee, just order your groceries online and you’ll get them delivered right at your doorstep at your preferred time. Use this referral link and get Php500 off for a minimum spend of Php2,500.  You can download the Honestbee app on iTunes or Google Play.

If you’re in the US and an Amazon Prime member, sign up for a free trial of Amazon Fresh to get your groceries delivered to you.

Recipe: Carrot Cupcakes

Carrot cupcakes are the miniature version of carrot cakes. The World Carrot Museum posits that carrot cakes originated from carrot puddings enjoyed by Europeans during medieval times, which then arose due to the innate sweetness of the vegetable, making it surprisingly an appropriate ingredient for desserts.

I prefer baking cupcakes over full-sized cakes as there is less chance of baking fails.  This is a tweaked version of a recipe I found on Pinterest, adjusted based on availability of ingredients.

Ingredients:

Cupcakes

  • 1 cup flour
  • 3/4 cup sugar
  • 1 tsp cinnamon
  • 1 tsp baking soda
  • 1/2 tsp baking powder
  • 1/4 tsp salt
  • 1 1/2 cups carrots, grated
  • 2/3 cup oil
  • 2 eggs, beaten

Frosting:

  • 1 225g bars cream cheese
  • 1/2 cup powdered sugar
  • 1 1/4 tsp vanilla
  • 3/4 cup cold all purpose cream

Procedure:

To make the cupcakes:

  • Pre-heat oven to 175-deg C.
  • In a large bowl, combine flour, sugar, cinnamon, baking soda, baking powder and salt.
  • Combine grated carrots and oil in a separate bowl. Slowly add flour mixture, while stirring until just mixed. Add beaten egg and stir for a few more times.
  • Line muffin pans with paper cups. Fill each cup 2/3 of the way, then bake for 13-15 minutes or until a toothpick comes out clean when you insert it in one of the cakes.
  • Set aside and let cool.

To make the frosting:

  • Beat cream cheese until smooth.
  • Sift powdered sugar into the bowl. Mix then add vanilla.
  • Beat in the cream at medium-high speed.
  • Transfer the mixture to a piping bag with your desired tip, then pipe frosting onto the cooled cupcakes.
  • Top with carrot-shaped candy for a fun and festive look.

Yields 12 moist and yummy cupcakes.

Recipe: Slow Cooker Mashed Potatoes

Mashed potatoes are a great side dish, particularly to grilled meats such as Steaks, Roast Pork and Lamp Chops.

However, its preparation can require a lot of time and energy which we working moms don’t have quite a lot of, do we?

I came across a recipe for crock pot mashed potatoes on Pinterest and I decided to try it out.

I’m happy to discover that the slow cooker does take out the tedious part of making mashed potatoes: boiling the spuds in water and waiting for them to get soft enough to mash. With the slow cooker, you just dump the potatoes along with some broth and butter, then leave them for a few hours.

After adding cream and mik, you get smooth and creamy mashed potatoes.

This recipe is slightly tweaked from the recipe I found on Pinterest due to availability of ingredients.

Ingredients:

  • 2 k potatoes, peeled and cut into 1 1/2 in pcs
  • 1 cup chicken broth
  • 3 cloves garlic, minced
  • 1/3 c butter, diced
  • Pinch of salt
  • 1/2 c milk
  • 1/3 c all purpose cream
  • Pepper to taste

Procedure:

  • Place potatoes, garlic, broth and butter into the slow cooker. Season with salt, mix together and cover with lid. Cook on HIGH setting for 4 hours or low setting for 8 hours until potatoes are soft.
  • Mash the potatoes and stir in milk and cream until well combined and creamy. Season with pepper.
  • Keep in the slow cooker on WARM until ready to serve.

Recipe: Mini Blueberry Cheesecakes

Cheesecakes are a decadent pleasure. Rich, creamy and delightfully sinful, cheesecakes have been around probably for as long as the phrase “the land of milk and honey” have been in use.

For my DIY desserts, I gravitated towards mini cheesecakes since baking time is shorter and there is less chance for uneven cooking of the filling.

Here is a tried-and-tested recipe of Mini Blueberry Cheesecake that I prepared for my family last New Year.

Ingredients:

For the crust:

  • 2 cups crushed graham crackers
  • 1 stick of butter, melted
  • 3 tbsp white sugar

For the filling:

  • 2 225g bars of Magnolia Cream Cheese at room temperature
  • 1 cup white sugar
  • 2 large eggs
  • 1 cup all purpose cream
  • 2 tsp vanilla extract
  • 1/2 tsp fine salt
  • 1 595g blueberry filling

Procedure:

  • Pre-heat oven to 175-deg C and line muffin pans with paper cups

To make the crust:

  • In a bowl, combine graham cracker crumbs, sugar and melted butter.
  • Press 1/2 tbsp of the crumb mixture onto the bottom of the muffin cups. Set aside.

To make the filling:

  • Beat cream cheese at lowest setting until smooth and fluffy.
  • Gradually add sugar and salt while beating.
  • Add eggs one at a time until incorporated then add vanilla extract and cream. Mix well.
  • Allow cheesecake batter to rest for 10 minutes to remove air bubbles formed during the mixing process.
  • Scoop cheesecake batter into prepared crust and bake for 20-25 minutes or until sides are firm but center is slightly jiggly.
  • Remove cheesecakes from the oven, let them cool then refrigerate overnight.
  • Serve with chilled blueberry filling.

Note: You can replace the blueberry filling with red cherry filling.

Recipe: Frozen Mocha Cheesecake

My mom discovered the recipe for Frozen Mocha Cheesecake several decades ago and it has become a family favorite. We whip it up every year, particularly during special occasions and clan get-togethers. I decided to make it in time for our New Year’s Eve celebration tonight.

The original recipe is closer to this, but over the years, we have changed some ingredients depending on what is easily available or cheaper to buy.

Ingredients:

For the crust:

  • 30 pcs Hi-Ro chocolate biscuits, crushed (remove white filling prior to pounding with mortar and pestle) (Note: You can buy pre-crushed chocolate biscuits in some baking supply stores but these are usually available per kilo.)
  • 1 100g stick Dari Creme butter, softened
  • 2 tbsp white sugar

For the filling:

  • 2 225g packs Magnolia Cream Cheese, softened
  • 1 300ml can Alaska sweetened condensed milk
  • 2/3 cup Clara Ole chocolate syrup
  • 1 tbsp Blend 45 instant coffee dissolved in 1 tsp hot water
  • 1 250ml Alaska Crema All Purpose Cream (you can use whipping cream as a more indulgent – or expensive – alternative)

Procedure:

  • Combine all crust ingredients and press into the bottom of a 9-in spring form pan. Set aside.
  • In a large bowl, beat cream cheese until smooth. Add in condensed milk, chocolate syrup and dissolved coffee.
  • In another bowl, whip all purpose cream until fluffy. Fold into the cream cheese mixture until evenly distributed.
  • Pour the mixture into the crust. Sprinkle some crushed chocolate biscuits on top as garnish.
  • Put into the freezer for 6 hours until set.

Enjoy!

DIY Gift: Hot Chocolate on a Stick

Every holiday season brings the same struggle: what to give to all of the family’s relatives, friends and co-workers for Christmas that will be unique, can be useful to or enjoyed by the recipient, and won’t go over the family’s gift budget?

Last year, we gave out over 100 bags of Chocolate Chip Cookies which my daughter and I baked and packed as our gifts. Thankfully, I know a baking supplies store nearby so I was able to save considerably on ingredients.

This year, while surfing through Pinterest, I discovered a new gift idea: Hot Chocolate on a Stick!

The recipe below is further simplified from the one I found on Pinterest, but still quite yummy! Best of all, ingredients and tools are easy and cheap to come by, thanks the nearby baking supplies store.

Ingredients:

  • 2 cups semi-sweet chocolate chips
  • 1/4 tsp peppermint oit
  • 15 large marshmallows
  • additional milk chocolate chips and candy sprinkles as garnish

You will also need:

  • Coffee stirrers or plastic straws to serve as sticks
  • Individual plastic wrappers
  • Gift ribbons
  • Gift labels

Procedure:

  • Melt the semi-sweet chocolate chips in the microwave. (Medium high power for 30 secs and High power for 15 secs; resulting melted chocolate should be thick and have a nice sheen)
  • Mix in the the peppermint oil.
  • Pour the mixture into 2 tbsp chocolate molds (I used a small ice cream scoop to measure out and pour the mixture into small puto molds)
  • Spear each marshmallow with a plastic straw then placed it in the middle of each mold
  • Place in the refrigerator for 5 hours or until set.

I wrapped these with individual food-grade plastic wrappers decorated with red satin ribbons. I included a tbsp of milk chocolate chips and 1/8tbsp of candy sprinkles per package as garnishes. The label should indicate that the hot chocolate on a stick should be stirred into a cup of hot milk until the chocolate is melted.

This recipe yields 15 sticks.

Why we should donate blood

I joined the Red Cross Youth org in my university during my college years. While I handled several projects for the org, I never got around to donating blood. At the time, I was afraid of the needles used, the sight of blood or the medical team sometimes had trouble locating the blood vessel in my arm optimal for blood extraction.

I started donating blood a few years ago. The employees’ union at my office had a bloodletting activity and, as a show of support and with some friendly competition among my coworkers, I joined those donating blood. It was fairly painless plus the union officers even gave me a mug and a shirt as a souvenir.

Since then, health and schedule permitting, I have tried to regularly donate blood at a nearby hospital. I even brought my husband with me once and we made the experience into a bonding activity. On my next donation this December, I plan to bring my eldest daughter so I can instill the habit in her as well.

My reason for donating blood is that it’s one of the easiest ways I can contribute to someone’s life. One pint of blood can be broken down into three components – red blood cells, plasma and platelets – thereby possibly saving up to three lives.

And don’t worry about your donation going to waste.  There’s actually a lot of demand for donated blood.  Yours may even reach the farthest areas in the country, and may help save lives in far-flung provinces.

Given the demands on my time and resources, I can’t contribute much to charity or volunteer at my chosen causes. Giving blood, however, simply involves a trip to the hospital and a few minutes at the blood bank, or some time away from my desk during the office’s blood donation drive.

Blood donation also affords me several health benefits:

  • A free mini-physical that checks my pulse and blood pressure as well as a free blood analysis that checks for the presence of infectious diseases.
  • Prevents hemachromatosis, a health condition brought about by too much iron in the blood. By maintaining healthy iron levels in the blood, the risk of certain cancers, liver and heart ailments are also minimized.
  • It helps in weight loss. Every donation burns around 650 calories, which to me is the equivalent to three hours at the treadmill.
  • It also stimulates production of new blood cells further contributing to the maintenance of good health.

To be eligible to donate, I needed to be the following:

  • In good health.  You should be feeling well at the time of donation.
  • Between 16 to 65 years of age.  If below 18, you will need your parent’s consent to be able to donate.
  • Weighing at least 110 pounds.
  • Having a normal blood pressure, between 90 and 160 mmHg (systolic), 60 and 100 mmHg (diastolic)
  • Able to pass the physical and health history assessments that will be conducted immediately before the donation.

After the procedure, I was given refreshments (usually a snack and a juice box which I should consume before leaving the donor area), and these reminders:

  • Rest and remain in the area for 15 minutes.
  • Increase fluid intake for the next 24 hours.
  • No smoking within the next 3 hours and no alcoholic beverages for the next 24 hours.
  • No strong pressure or heavy lifting on the donating arm for the next 24 hours to avoid bruising.
  • No strenuous activity or hazardous work for the next few hours.

Blood donation is a way for me to give of myself. It is my gift of life to whoever has the urgent need for it.

If you want to donate blood, check out the Red Cross website for more information.

Quick and Easy Chocolate Chip Cookie Recipe

Ever since Hubby got me a convection oven, I have been scouring the net for baking and roasting recipes so I can maximize my new toy. This weekend, I decided to bake my family’s all-time favorite: chocolate chip cookies. I tweaked some items in the recipe I found (I added walnuts and tweaked the ratio of brown to white sugar).

Ingredients:

  • 2 cups softened unsalted butter
  • 2 cups brown sugar
  • 2 cups white sugar
  • 4 large eggs
  • 1 tbsp vanilla extract
  • 5 cups all-purpose flour
  • 2 tsp baking soda
  • 4 cups semi-sweet chocolate chips
  • 1 cup chopped walnuts


Procedure:

  1. Pre-heat oven to 190-deg C.
  2. In a large bowl, mix together butter, brown sugar and white sugar until well-combined.
  3. Mix in eggs and vanilla.
  4. Fold in flour and baking soda until mixture forms a smooth dough.
  5. Fold in chocolate chips and walnuts until evenly distributed.
  6. Scoop the dough into balls into a baking tray lined with butterred wax paper. Bake for 12 minutes.

Yields 96 4-inch cookies.

Filipinos in the Gilded Age at the Leon Gallery

I’m the proud mom of a self-proclaimed art freak. My baby girl, Mica, has been going on and on about this art exhibit in Makati. Since I found myself with a bit of free time, I decided to indulge her new interest and together, we checked out the Filipinos in the Gilded Age exhibit at the Leon Gallery.

ZZ Blog Revisit
ZZ Blog Revisit
ZZ Blog Revisit
ZZ Blog Revisit

Walking into the gallery is like being transported back in time. The gallery was dressed up as a well-appointed colonial room, making it feel like we were stepping into a 19th-century Filipino home. Mica’s eyes lit up as she eagerly pulled me towards the paintings, her excitement contagious.

ZZ Blog Revisit
ZZ Blog Revisit
ZZ Blog Revisit
ZZ Blog Revisit

The exhibit features artworks of Filipino artists during the 19th century, showcasing the oeuvre of illustrious ilustrados such as Juan Luna, Damian Domingo, Jose Taviel de Andrade, and Felix Resurreccion Hidalgo, among others. These pieces depict scenes of colonial Philippines as well as the faces and views encountered by these artist-ilustrados in their European travels.

ZZ Blog Revisit
ZZ Blog Revisit
ZZ Blog Revisit
ZZ Blog Revisit

Mica waxed poetic about Hidalgo’s sweeping seascape and Luna’s brooding portrait of a Spanish noblewoman, her eyes wide with admiration and her words tumbling out in an enthusiastic rush. I found myself particularly drawn to Hidalgo’s impressionistic depictions of women in natural settings, their ethereal beauty captured with delicate brushstrokes. Equally captivating were the anito-ish renditions of religious icons, blending indigenous spirituality with colonial influences.

ZZ Blog Revisit
ZZ Blog Revisit
ZZ Blog Revisit
ZZ Blog Revisit

The exhibit raised intriguing questions about identity and artistic expression. It highlighted how these Filipino artists, inspired by the Hapsburg imagination and the beauty of the Baroque and Rococo styles, managed to blend Western techniques with their own cultural narratives. This fusion of influences is a testament to their resilience and creativity, forging a unique Filipino identity in the face of colonial domination.

ZZ Blog Revisit
ZZ Blog Revisit
ZZ Blog Revisit
ZZ Blog Revisit

As I stood before these masterpieces, I couldn’t help but reflect on the journey of our ancestors—how they adapted, resisted, and ultimately created something profoundly their own. The exhibit seeks to provide this generation’s new breed of artists a glimpse into the legacy of past masters and a peek into the struggles of Filipino artists in forging an identity amidst colonial rule.

ZZ Blog Revisit
ZZ Blog Revisit
ZZ Blog Revisit
ZZ Blog Revisit

On the 155th birthyear of José Rizal, the consummate and quintessential ilustrado, we salute all his comrades in the arts. The exhibit beautifully honors their contributions and the rich cultural heritage they helped to shape.

ZZ Blog Revisit
ZZ Blog Revisit
ZZ Blog Revisit
ZZ Blog Revisit

Our visit to the Filipinos in the Gilded Age exhibit was a deeply enriching experience. It not only allowed me to bond with Mica over our shared appreciation of art but also offered us both a profound connection to our history and heritage. As we left the gallery, Mica’s excitement was palpable, her mind buzzing with new ideas and inspirations.

ZZ Blog Revisit
ZZ Blog Revisit
ZZ Blog Revisit
ZZ Blog Revisit

Filipinos in the Gilded Age is on show at the Leon Gallery located at G/F Corinthian Plaza, Paseo de Roxas, Legaspi Village, Makati City until July 20. Entrance is free. Whether you’re an art aficionado or simply curious about our nation’s past, this exhibit is a must-see.