Recipe: Shrimp Mardi Gras

As a true-blue foodie, I sometimes get the urge to have the delicious dishes I’ve tasted in restaurants right in the comfort of my home. This inclination not only allows me to test out and expand my mad skills in the kitchen, but also enables me to share my food adventures with the fam (and even friends) without breaking the bank. (Take my Cheesy Baked Salmon recipe for example. It has become a go-to holiday dish not just in my family but also among my friends who can’t thank me enough for the recipe.)

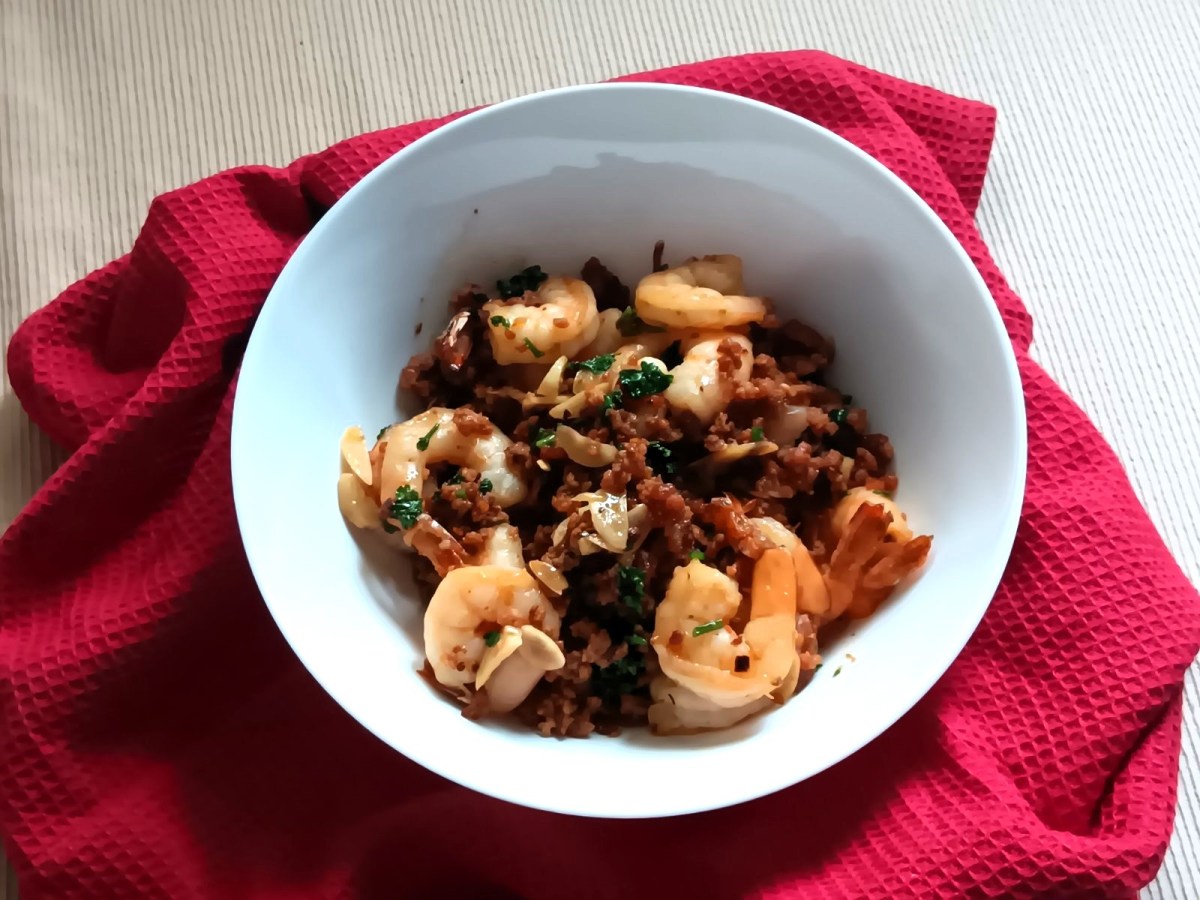
This takes us to Shrimp Mardi Gras by The Shrimp Bucket.

About the Dish

The Shrimp Bucket serves jumbo white shrimps, crabs and mussels – whether boiled, grilled or fried – in a bag by the pound drenched in a flavorful sauce of the diner’s choice. As it turns out, one of my favorite sauces is Mardi Gras.

The sauce is named after the famous Louisiana, USA holiday that takes place on the Tuesday immediately preceding Ash Wednesday, which in turn, signal the start of the Lenten Season. As Lent is a time of fasting and abstinence, Mardi Gras – also known as Fat Tuesday – presents the last chance for people to eat rich foods before they deprive themselves in keeping with the season.

True to its name, this flavorful buttery and garlicky adds a lot of richness to The Shrimp Bucket’s offerings. I can’t wait to prepare this for my family.

My take on the recipe

After a bit of trial and error, here’s the recipe that best approximates the flavors that I love with The Shrimp Bucket’s Shrimp Mardi Gras. I had to tweak the ingredients a bit by substituting fresh shrimp with packaged frozen jumbo shrimp, and Spanish chorizo with skinless longganisa, for convenience and economy.

Ingredients:

  • 500g frozen jumbo frozen jumbo shrimp
  • 5 pieces skinless pork longganisa
  • salt to taste
  • 2 tablespoons butter
  • 1 whole garlic, peeled and sliced thinly
  • 1/2 teaspoon red chili flakes
  • 1/2 teaspoon paprika
  • 1 tablespoon dry white wine (in my case I used what wine was available – Pink Moscato)
  • 1 tablespoon lemon juice
  • 1/4 cup chopped fresh parsley

Procedure:

  • Thaw the shrimp and pat dry then season with salt.
  • Fry the longganisa on a hot pan, sauteing and breaking the pieces up into bits until lightly toasted and oil has been rendered. Place the longganisa bits off to the side of the pan.
  • Add the butter then stir in the garlic and the chili flakes. Saute until the garlic slices are lightly browned (be careful not to burn them).
  • Add the shrimp and the paprika. Saute together with the longganisa bits until shrimp is cooked, turning opaque and slightly pink. Remove the pan from heat.
  • Stir in the wine, lemon juice and parsley.
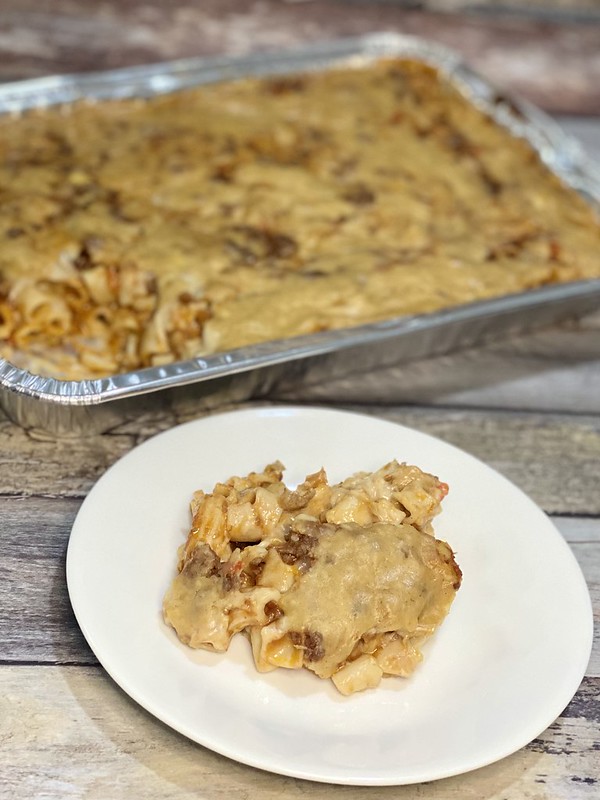
  • Serve hot with hot rice or crusty bread.

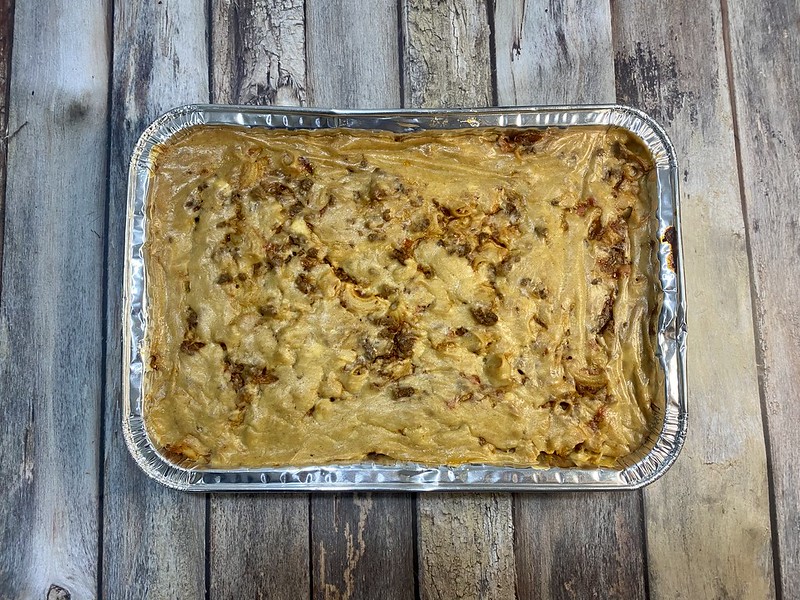
If the empty plates at the end of our meal was anything to go by, I’d say that this dish was a hit with the fam!

Next time, I’ll try the Mardi Gras sauce with some steamed mussels and pair the dish with Creamy Salted Egg Shrimp.

When to serve

I’m sure you’d love this dish as well and would want to show it off during special occasions. Here are some of the instances when it will definitely be a showstopper:

  • Family Reunions. Bring a special treat to seafood lovers in the next clan get-together. The good news is that even the meatlovers would love it too!
  • Holiday Meals. Add this to your Noche Buena or Media Noche spread to make your holiday feast one for the books!
  • Office Potlucks. Wow your co-workers with your kitchen prowess with this tasty viand.

How about you? When will you be serving this up to your nears-and-dears?

Check out other quick and easy recipes from my online cookbook:

Recipe: Cinnamon Pecan Pudding

Here’s my confession: I get so antsy at the thought of food waste.

I don’t like the idea of throwing perfectly good food away just because the fam got tired of it. This attitude is probably a holdover from my younger years when my family was not living as comfortably as we are now and I didn’t get to enjoy a lot of good food.

Still, getting my fam to finish of every last bite of leftover bread can be quite a challenge.

After all, while freshly baked bread does get us salivating at the mere aroma of it wafting from the oven, stale leftover bread is, at best, ignored and placed at the back of the refrigerator.

Cinnamon Pecan Pudding

The solution? Re-invention!

With just a few additional ingredients, a little bit of prep work and some time in the oven, the leftover bread that my kiddos turn their nose up at becomes a mouthwatering dessert.

I got the idea for this recipe from fellow blogger Tina of Hungry Travel Duo who made a Creamy Bread Pudding from stale bread. I just made a few substitutions – such as using leftovers from my homemade bread and using pecans instead of raisins (because I’m not big on raisins!) – and adjustments for my family’s taste – like doing away with the sweet milk sauce – and my Cinnamon Pecan Pudding came to be.

Cinnamon Pecan Pudding

Here’s how I did it:

Ingredients:

  • 6 to 8 1-inch slices of bread cut into 1-inch cubes (you can use 8 to 10 pieces of regular sliced bread)
  • 1 teaspoon vanilla extract
  • 1/2 teaspoon cinnamon powder
  • 2 tablespoons room temperature butter
  • 2 eggs, beaten
  • 1 cup roughly chopped pecans (you can substitute this with chopped walnuts)
  • 3/4 cup condensed milk
Cinnamon Pecan Pudding

Procedure:

  • Grease a baking pan with butter.
  • Spread the cutup bread and 3/4 cup of pecans evenly in the pan.
  • In a bowl, whisk together the beaten eggs, cinnamon powder and condensed milk, then pour over the bread.
  • Top with the remaining pecans.
  • Bake in a 200 deg C oven for twenty minutes until golden brown.
Cinnamon Pecan Pudding

This recipe is great when you want a quick and fuss-free dessert or if you want something fresh from the oven for your coffee break.

How about you? How would you re-invent your leftover bread?

Check out my other dessert recipes:

Boost your immune system with easy and healthy dishes from La Germania

La Germania dishes nutritious recipes to strengthen you and your family amid cold and flu season

The new year marks a fresh start, but it also means that flu season is upon us. That’s why it’s vital for you and your loved ones to take care of your health. One of the best ways to shield ourselves from diseases and possible health risks is preparing nutritious dishes at home.

To help you boost your immune system amid flu season, La Germania shares three recipes that are easy to make and rich with health benefits. By preparing these dishes at home, you also get to make a lot of savings. Hence, you hit two birds with one stone.

Get fancy with Salmon en Papillote

La Germania Healthy Dishes

French cuisine may sound intimidating, but this tender fish is deceptively easy and fast to prepare. Salmon is one of the most nutritious foods in the market, rich in omega-3 fatty acids and B vitamins. Omega-3 fatty acids help build and maintain a healthy body, while B vitamins are a good energy source and may help with certain health problems, like migraines and anxiety. Baking this flavourful French dish will be a total breeze with your La Germania oven range.

Ingredients:

  • 1.5 lbs salmon, cut into four pieces
  • One small zucchini, thinly sliced
  • One head fennel, thinly sliced
  • One lemon, thinly sliced
  • 1 tsp dried dill
  • 4 tsp extra virgin olive oil
  • 1 tsp salt
  • 1/2 tsp pepper
  • Parchment paper

Procedure:

  • Preheat the oven to 375°F.
  • Cut parchment into four large ovals 15” by 10” inches. Then, fold each parchment in half.
  • On half of each parchment, layer on ¼ of the zucchini, ¼ the fennel, one piece of salmon, sprinkle with ¼ tsp salt, ¼ pepper, ¼ tsp dill, lemon slices, drizzle each salmon with one teaspoon olive oil and a few pieces of fennel fronds. Repeat this process with the three remaining salmon filets.
  • Close the parchment by folding the other half over the prepared salmon and carefully roll the open edges toward the center.
  • Set pouches on a baking sheet and bake on the center rack for 15 minutes.
  • Open carefully using a fork and serve.

Snack it up with Baked Garlic Sweet Potatoes

La Germania Healthy Dishes

If you’re in the mood for a delicious snack, you can forgo junk food and try this affordable yet delectable option instead. Sweet potato (a.k.a kamote) is a superfood packed with plenty of nutrients like Potassium, beta-carotene and Vitamin C. Potassium regulates one’s heartbeat. In contrast, beta-carotene is good for one’s eyesight. Meanwhile, Vitamin C is necessary for the growth, development, and repair of all body tissues. That’s why you should eat more sweet potatoes this flu season. With a La Germania compact oven in your arsenal, you can bake this mouthwatering dish to your heart’s content.

Ingredients:

  • Four medium sweet potatoes, peeled and cut into 1/4-inch matchsticks
  • Two tablespoons olive oil
  • Kosher salt and freshly ground black pepper, to taste
  • Five cloves garlic, pressed
  • 1/2 cup grated Parmesan cheese
  • Two tablespoons chopped parsley leaves for garnish

Procedure:

  • Preheat the oven to 400°F. Lightly oil a baking sheet or coat with nonstick spray.
  • Place the sweet potatoes in a single layer onto the prepared baking sheet. Add olive oil and gently toss to combine; season with salt and pepper to taste. Place into oven and bake for 35-40 minutes, or until golden and crisp, tossing occasionally.
  • Combine sweet potato with garlic and Parmesan cheese.
  • Serve immediately, garnished with parsley, if desired.

Recipe from DamnDelicious.net.

La Germania Healthy Dishes

There’s nothing like a warm soup to stay healthy this cold and flu season. You can skip the store-bought or instant soup by making this soup dish full of immunity-boosting, anti-inflammatory, and detoxifying ingredients like assorted vegetables and a medley of spices. Following this 30-minute recipe will be easy peasy with your La Germania electric stove.

Ingredients:

  • One tablespoon olive oil
  • One yellow onion, diced
  • Six cloves garlic, minced
  • 1/2 teaspoon freshly grated ginger
  • One teaspoon turmeric
  • ½ teaspoon paprika
  • One tablespoon lemon juice
  • One large sweet potato (about 1/2 lb) diced into ½” cubes
  • 1 15oz can of chickpeas, rinsed and drained
  • 1 cup red lentils, uncooked and rinsed
  • 5 cups vegetable broth
  • 1/2 cup kale, destemmed and torn into 1” pieces
  • Salt to taste

Procedure:

  • In a large pot or dutch oven, heat the olive oil over medium heat for 1 minute.
  • Add the onion and cook over medium heat for 8 minutes, stirring occasionally.
  • Add the garlic and ginger and continue to cook for 1 minute until fragrant.
  • Add the turmeric and paprika and continue to cook for 1 minute.
  • Add the lemon juice, sweet potatoes, chickpeas, red lentils, and vegetable broth and bring to a boil.
  • Once the soup begins to boil, reduce the heat to low and simmer for 15-20 minutes until the sweet potato is soft.
  • Add kale and continue to cook for 2-3 minutes until the kale has softened and wilted slightly.
  • Season with salt to taste.

Photo and Recipe from IHeartVegetables.com.

Built according to the highest European standards in terms of construction and design, La Germania appliances allow you to prepare nutritious dishes in an efficient and easy way. With guaranteed durability and superior quality, they’re a good investment for you to channel your inner chef, and make more immune-boosting food at home.

La Germania products are available online through La Germania’s official e-commerce website www.lagermaniaph.com and e-commerce platforms on Shopee and Lazada. You may follow the trusted kitchen and appliance brand’s official Facebook and Instagram accounts for more information on La Germania and its products.

Recipes and images provided by La Germania in a recent press release.

Gear up for cooking.

La Germania Electric Thermostat Oven
La Germania Range FS5031 21XR oven

Elevate your holiday treats with the latest in world-class cooking technology

La Germania shares 3 easy and irresistible dessert ideas to satisfy your sweet tooth and gift your loved ones this Christmas season

The most wonderful time of the year is right around the corner! It’s no secret the Philippines celebrates the earliest and longest Christmas season in the world, especially when this holiday commemorates the 3 things Pinoy families value the most: faith, family and food.

Approaching the holidays, the kitchen comes alive with the hustle and bustle of delicious meals sizzling on the stove and warming up in the oven, filling the house with mouth watering aromas that beg the curious question: “What are we having?”

However, although this is the most beloved holiday, it can also be the busiest and most stressful season for home cooks. Planning and preparing your Noche Buena meals and ordering gifts can not only be time-consuming, but costly as well.

This holiday season, consider going through the personalized route by baking up a storm and serving up some homemade treats that are handmade with love. These dessert recipes are sure to be the perfect gift for your loved ones, or satisfy their sweet tooths during your holiday feasts.

Christmas Cookies

La Germania Christmas Photos

Take a break from your usual chocolate-chip by making special Christmas cookies.

With your La Germania Table Oven, you can prepare these cute and quirky treats that celebrate the festive spirit! With its thermostat control and 60-minute timer, you can whip up the perfect batch to wow the crowd and experiment with a variety of different recipes even if you have a small kitchen space. Don’t forget to leave some for Santa Claus!

Ingredients:

FOR THE COOKIE DOUGH

  • 3 cups all-purpose flour, plus more for surface
  • 1 tsp. baking powder
  • 1/2 tsp. kosher salt
  • 1 cup (2 sticks) butter, softened
  • 1 cup granulated sugar
  • 1 large egg
  • 1 tsp. pure vanilla extract
  • 1 tbsp. milk

FOR THE BUTTERCREAM FROSTING

  • 1 cup (2 sticks) butter, softened
  • 5 cups powdered sugar
  • 1/4 cup heavy cream
  • 1/2 tsp. pure almond extract
  • 1/4 tsp. kosher salt
  • Food coloring

Directions:

  1. In a large bowl, whisk together flour, baking powder, and salt. Set the mixture aside after.
  2. In another large bowl, beat butter and sugar until fluffy and pale in color. Add egg, milk, and vanilla and beat until combined, then add flour mixture gradually until totally combined.
  3. Shape into a disk and wrap in plastic. Refrigerate for an hour.
  4. When ready to roll, preheat the oven to 350º and line two baking sheets with parchment paper. Lightly flour a clean work surface and roll out the dough until 1/8” thick. 
  5. Cut out shapes and transfer to prepared baking sheets. You can use cookie cutters for fun shapes. You can also make your own if you’re feeling creative. Freeze it for 10 minutes (so your shapes hold while baking).
  6. Meanwhile, make the frosting: In a large bowl using a hand mixer, beat butter until smooth, then add powdered sugar and beat until no lumps remain. Add cream, almond extract, and salt and beat until combined.
  7. Bake cookies until the edges are lightly golden, 8 to 10 minutes. 
  8. Let cool, then frost and decorate as desired.

Dulce de Leche

La Germania Christmas Photos

You can step up the sweetness this season by making your own Dulce de Leche.

Aside from enjoying it on its own, you can drizzle Dulce de leche on ice cream, add it to your usual brownies, or layer them in smores. There are so many ways to enjoy this versatile dessert, and it will be so easy to make at home with the help of an induction cooker! 

A staple in smaller homes, an induction cooker can do a lot of wonders. This heat-tempered glass worktop has a timer and child-lock, meaning you can cook dishes safely and precisely while you bond with your kids in the kitchen.

Ingredients:

  • 8 cups of whole milk
  • 2 to 2 ½ cups sugar (adjust based on your preference)
  • 1 tsp vanilla
  • ¼ tsp baking soda

Directions:

  1. Combine all the ingredients in a large pot over medium-low heat, stir until the sugar or panela is well dissolved. Reduce the heat to low.
  2. Continue cooking until the mixture is significantly reduced and starts to thicken while the color changes from a creamy beige to a caramel tone. It will take between 2 ½ hours to 3 hours for the dulce de leche to be done.
  3. During the first 1 ½ hours you will need to stir occasionally to prevent it from boiling over and sticking. During the last hour, it needs to be stirred more frequently and has to be watched very closely to keep it from burning – you can also decrease the heat to low. 
  4. Cook it until it has a dark amber or caramel tone and has a creamy consistency. Keep in mind that it will thicken more when it cools down.
  5. The final product can be served warm or cold and must be kept refrigerated.

Classic Bibingka

La Germania Christmas Photos

A Noche Buena spread is incomplete without the classic Filipino rice cake known as Bibingka.

With your 90cm oven, you can prepare this holiday favorite at home. With its five cooking functions, including a fan-assisted electric oven, you can cook up a storm. Plus, its enamel cavity finish is easy to clean, making the whole cooking process so much easier. Preparing this particular dish may look like a daunting task, but it’s actually pretty easy to make. 

Ingredients:

  • 1 cup rice flour
  • 1/8 teaspoon salt
  • 2 1/2 teaspoon baking powder
  • 3 tablespoons butter
  • 1 cup granulated sugar
  • 1 cup coconut milk
  • 1/4 cup fresh milk
  • 1 piece salted duck egg sliced
  • 1/2 cup grated cheese
  • 3 pieces raw eggs
  • Pre-cut banana leaf

Directions:

  1. Preheat your oven to 375 degrees Fahrenheit. Meanwhile, combine rice flour, baking powder, and salt then mix well. Set aside.
  2. Cream the butter then gradually put-in sugar while whisking. Then, add the eggs then whisk until every ingredient is well incorporated.
  3. Gradually add the rice flour, salt, and baking powder mixture then continue mixing.
  4. Pour in coconut milk and fresh milk then whisk some more for 1 to 2 minutes.
  5. Arrange the pre-cut banana leaf on a cake pan or baking pan.
  6. Pour the mixture on the pan, then bake for 15 minutes.
  7. Remove from the oven then top with sliced salted egg and grated cheese (do not turn the oven off).
  8. Put back in the oven and bake for 15 to 20 minutes or until the color of the top turns medium brown.
  9. Remove from the oven and let cool. Brush the dish with butter and sprinkle some sugar on top once it cools. You can also top this with grated coconut.

These are only some of the mouthwatering holiday treats you can prepare with your La Germania kitchen appliances. Built according to the highest European standards in terms of construction and design, La Germania appliances allow you to prepare your Noche Buena extravaganza in an efficient and easy way. 

What’s more, as a special holiday treat, enjoy FREE aprons and cookware for a minimum spend of Php 5,000 when you shop on La Germania’s website during their 11.11 sale this November 11-30, 2021. With guaranteed durability and superior quality, they’re a good investment for you to channel your inner chef, and unleash your kitchen genius for all seasons to come!

La Germania 11.11 2
La Germania 11.11 1

La Germania products are available online through La Germania’s official e-commerce website www.lagermaniaph.com and e-commerce platforms on Shopee and Lazada. For more information on La Germania and its products, you may follow the official Facebook and Instagram accounts of the trusted kitchen and appliance brand.

About La Germania

Italian-heritage brand La Germania has been the preferred kitchen companion of Filipino homemakers for 53 years and counting. Its wide array of ovens, cooktops, and stoves is made of high-grade materials and designed to stand the test of time and extensive use. La Germania’s current line of products continues to serve the cooking needs and lifestyle of this generation and the next.

Recipes and food images provided by La Germania in a recent press release.

Header photo Freepik.

#QuarantineCookbook: Egg Pie

One of my favorite merienda items back when I was little was the egg pie.

I just love the creamy custard filling that’s perfectly complemented by a buttery and flaky crust.

To this day, I still find myself craving for it from time to time, especially during my coffee break.

While it is readily available in my neighborhood, whether via delivery apps or by dropping by a mom-and-pop bakery, I figured it was best to make it from scratch at home, especially since I got hold of this recipe which seems to easy to make.

Egg Pie Recipe
Egg Pie Recipe

Ingredients:

Crust

  • 1 1/2 cups all purpose flour
  • 1 tbsp sugar
  • 1/4 tsp salt
  • 1/2 cup cold butter, cut into small cubes
  • 4 tbsp water
Egg Pie Recipe
Egg Pie Recipe

Filling

  • 3 whole eggs
  • 1 egg yolk
  • 1 egg white
  • 1 tsp vanilla
  • 1 300ml condensed milk
  • 1 370ml evaporated milk
Egg Pie Recipe
Egg Pie Recipe

Procedure:

To make the pie crust:

  • Combine flour, salt, sugar and butter in a bowl. Mix until fine crumbs form.
  • Add the water and mix until a dough is formed. Cover it in plastic wrap and refrigerate for at least one hour.
  • Roll out the dough on a flour-dusted board until it is 1/8-inch thick.
  • Transfer the dough to a lightly greased 9-inc round pan. Trim the excess dough and press the tines of a fork against the edges to create a design, then set aside.
Egg Pie Recipe
Egg Pie Recipe

To make the filling:

  • In a bowl, whisk together three whole eggs and one egg yolk.
  • Add the vanilla, condensed milk and evaporated milk, then stir well until thoroughly combined.
  • Strain the mixture twice, then set aside.
  • In another bowl, beat the egg white until stiff peaks form, thrn gently fold into the filling mixture.

To bake the pie:

  • Pour the filling into the prepared pie crust.
  • Gently tap the pie pan against your work surface to get rid of air bubbles.
  • Bake the pie in a pre-heated 180-degree C oven for forty-five to fifty minutes pr until the top turns brown.
  • Serve and enjoy!
Egg Pie Recipe
Egg Pie Recipe

The baking pie filled our home with the sweet scent of vanilla and custard and the fam could hardly wait for it to be fully cooked so we could all dig in.

We polished off the pan in no time at all!

I’ve made this pie for the fam several times already and it’s a hit every time.

Try this recipe yourself and let me know how it goes!

Gear up:

La Germania Electric Thermostat Oven
La Germania Range FS5031 21XR oven

Stock up:

Jelly’s Picks
Jolly Cow Pure Fresh Milk 1Lx3
Jelly’s Picks
Jolly Cow Condensada 390g

Disclosure: This post contains affiliate links.

Go on a virtual food trip with Del Monte Quick ‘n Easy Flavors of Asia

While I do enjoy traveling to new places here in the country and abroad, what I really look forward to are the new and exciting dishes I get to try.

I do travel through food and whenever possible, I include my family, especially my kids, in the experience. For me, delving into local cuisines is one of the best way to get to know a foreign culture. It paints a picture of the area’s agricultural scene as well as tells the story of its history, food traditions, values and influences.

However, traveling can be quite costly, time-consuming, and during a time a worldwide pandemic, well nigh impossible.

The solution? Going on a virtual food trip at home.

We might not have the means to always be ordering food from various restaurants to be able to go on our virtual food trip, but we can try to whip up exotic dishes ourselves for the fam to enjoy.

If you find cooking foreign cuisines quite intimidating, brush your fears aside. We now have a set of handy kitchen aids that will help us in achieving our lofty culinary goals.

Del Monte Quick ‘n Easy Flavors of Asia

Del Monte Flavors of Asia

These new additions to Del Monte’s line of mixes and sauces are set to make cooking exotic dishes so much easier not just for kitchen newbies, but also for more experienced cooks who may not have the time to study unfamiliar recipes.

Perfectly seasoned and blended to approximate the authentic taste of Asian dishes but still appeal to the Pinoy palate, Del Monte Quick ‘n Easy Flavors of Asia packs are made with real ingredients, bringing out real deliciousness in each dish with every bite.

By following the recipes in the packaging like I did, anybody can whip up real sarap Asian dishes at home, while saving on time and effort in securing and preparing various ingredients.

Get ready for your culinary adventure with these!

Teriyaki Marinade 80ml

Del Monte Flavors of Asia

Teriyaki is a cooking style used in Japanese cuisine wherein food are grilled or boiled with a glaze of soy sauce, mirin and sugar.

Made with real ginger and soy sauce, Del Monte Quick ‘n Easy Teriyaki Marinade brings out the signature sweet and savory flavors of a Japanese-style Teriyaki dish!

Chicken Teriyaki

Del Monte Flavors of Asia

Ingredients:

  • 1/2 kilo chicken breast, filleted and cut into thin slices
  • 1 80ml sachet of Del Monte Quick n Easy Teriyaki Marinade
  • 1/4 cup spring onions sliced thinly
  • 1/2 tbsp sesame seeds

Procedure:

  1. Marinate the chicken in Del Monte Quick ‘n Easy Teriyaki Marinade for at least 30 minutes.
  2. Place the marinated chicken into skewers
  3. Pan-grill the chicken while basting with the marinade.
  4. Garnish with spring onions and sesame seeds before serving.

This recipe makes 6 servings.

Green Curry Mix 30g

Del Monte Flavors of Asia

Sweet green curry – also known as kaeng khiao wan – derives its name from the creamy mild green color of the dish brought about by the combination of green chillies and coconut milk.

Del Monte Quick ‘n Easy Green Curry Mix contains turmeric, ginger and other spices which brings that fresh taste of Thai-style sweet green curry dish.

Green Curry with Chicken

Del Monte Flavors of Asia

Ingredients:

  • 1/2 kilo chicken breast, filleted and cut into thin slices
  • 1 30g pack of Del Monte Quick n Easy Green Curry Mix
  • 2 tbsp oil
  • 1 400ml can coconut milk
  • 1 small eggplant, sliced
  • 1 red bell pepper sliced
  • 1 bunch Thai basil leaves

Procedure:

  1. Heat oil and Del Monte Quick ‘n Easy Green Curry Mix in a saucepan until fragrant.
  2. Stir in coconut milk and simmer for 3 minutes.
  3. Add in chicken and simmer in a covered saucepan for 12 minutes. Stir occasionally.
  4. Add eggplant and simmer for 5 minutes.
  5. Add red bell pepper and basil. Simmer for another minute.
  6. Serve and enjoy!

This recipe makes six servings.

Red Curry Mix 40g

Del Monte Flavors of Asia

Curry originated in the Indian subcontinent with its name coming from the Tamil word kari which refers to a sauce or soup eaten with rice. While Indian cuisine is highly diverse, it is also highly influential: India’s spice trade with Europe sparked the Age of Discovery. Indian cuisine’s influence is present in the food cultures of Britain, the Middle East, Southern and East Africa, Southeast Asia, North America and the Pacific Islands.

Made with real paprika, cayenne and other spices, Del Monte Quick ‘n Easy Red Curry brings out the spice and richness of Indian-style curry dishes!

Red Chicken Curry

Del Monte Flavors of Asia

Ingredients:

  • 1/2 kilo chicken breast, filleted and cut into thin slices
  • 2 tbsp oil
  • 1 35g pack of Del Monte Quick n Easy Red Curry Mix
  • 1 400ml can coconut milk
  • 1 bunch French beans
  • 1 red bell pepper cut into strips
  • 1/2 cup cilantro

Procedure:

  1. Heat oil and Del Monte Quick ‘n Easy Red Curry Mix in a saucepan until fragrant.
  2. Stir in coconut milk and simmer for 3 minutes.
  3. Add in chicken and simmer in a covered saucepan for 12 minutes. Stir occasionally.
  4. Add French beans and simmer for 5 minutes.
  5. Add red bell pepper and cilantro. Simmer for another minute.
  6. Serve and enjoy!

So if you feel like broadening your culinary horizons, stock up on Del Monte Flavors Asia on Lazada.

#QuarantineCookbook: Brazo de Mercedes with Jolly Cow Condensada

Which Filipino dessert does everyone in your family looked forward to when you were young?

Mine was the Brazo de Mercedes.

This scrumptious meringue roll with a thick and rich custard center is actually named after Mama Mary, the Nuestra Senora de las Mercedes or the Virgin of Mercy.

It is said to date back to the Spanish colonial period when Filipinos sought to repurpose discarded egg yolks when builders at the time would use the egg whites for mortar and plaster for houses and structures.

Brazo de Mercedes with Jolly Cow Condensada

Whenever my parents brought home a roll of Brazo de Mercedes, my brothers and I knew that something wonderful was waiting for us come dessert time.

Despite both my mom and I being both home bakers, it took us a while to attempt to make Brazo de Mercedes, primarily because the egg whites need a high-powered mixer to become a fluffy meringue.

Thankfully, Hubby gifted me with a KitchenAid 5QT Artisan Stand Mixer which made making this dessert a breeze.

Now that the meringue won’t be a problem, I know the custard won’t give me any worries either, thanks to Jolly Cow Condensada.

With its rich, creamy texture and right amount of sweetness, it helped make the custard filling of my Brazo de Mercedes absolutely Creamy Sarap and so irresistible.

Brazo de Mercedes with Jolly Cow Condensada

Ingredients:

Custard:

  • 1 390g can Jolly Cow Condensada
  • 10 egg yolks
  • 1 tsp vanilla
  • Zest of 1 lemon

Meringue:

  • 10 egg whites
  • 1 tsp cream of tartar
  • 1 cup sugar
  • 1/4 cup powdered sugar
Brazo de Mercedes with Jolly Cow Condensada

Procedure:

Combine egg yolks, condensed milk, vanilla and lemon zest in a double boiler over low heat. Cook while stirring regularly for about 30 minutes until mixture thickens into a spreadable paste. Remove from heat and set aside to allow to cool.

Combine egg whites and cream of tartar in a bowl and mix at slow speed until they form a thick foam. Add sugar in small amounts while continually beating, gradually increasing speed until stuff peaks form and the mixture is smooth and glossy with no sugar grains.

Line a baking sheet with wax paper and lightly grease it. Spread the meringue evenly on the sheet to about 1/4 inch thick. Bake at 350 deg F (177 deg C) for 20 minutes until the meringue is set and the top has turned light brown. Remove from the oven and allow to cool.

Using a light mesh sieve, lightly dust the meringue with powdered sugar. Cover with another sheet of lightly greased wax paper the gently invert to transfer the meringue onto the new wax paper and peel off the wax paper on top.

Spread the custard mixture evenly on the 3/4 of surface of the meringue. Starting from the side with the custard, carefully roll the meringue into a log.

Cover both ends of the log with wax paper and chill in the refrigerator for at least an hour before serving.

Brazo de Mercedes with Jolly Cow Condensada

My son has declared this his “Number 1” favorite dessert (among the many sweets I’ve made for him so far), and I know I’ll have lots more for him to sample with my pantry fully stocked with Jolly Cow Condensada.

Try this recipe and let me know what you think!

Gear up for baking

KitchenAid 5QT Artisan Stand Mixer
La Germania Range FS5031 21XR oven

Stock up on ingredients

Jelly’s Picks
Jolly Cow Condensada 390g

#QuarantineCookbook: Cheesy Baked Macaroni

My mom’s Cheesy Baked Macaroni has always been a family favorite.

She used to make it for the fam during special occasions such as birthday dinners or holiday feasts. We would sometimes bring it as our contribution to our clan’s potluck parties.

Later on, when I got married, Hubby would request a tray of Baked Macaroni from my mom for his birthday.

What makes this version different from other Baked Macaroni recipes is the flavor and aroma from the red bell peppers. Coupled with the melted cheese, it helps make a truly mouthwatering dish!

Baked Mac Recipe
Baked Mac Recipe

It took me a while to gather up the courage to cook this dish given the sheer weight of expectations surrounding it, but I’m sure glad I did!

I was able to piece together the recipe, thanks to my memories from years of helping my mom cook this, as well as a few phone calls to my mom, just to make sure I’m on the right track.

I’ve made this dish three times in as many weeks so far, a testament to how much my fam loves it.

Check it out!

Ingredients:

  • 1/2 kg elbow macaroni, cooked according to package instructions
  • 1/2 kg ground beef
  • 2 tbsp cooking oil
  • 5 cloves garlic, finely chopped
  • 1 onion, finely chopped
  • 4 red bell peppers, finely chopped
  • 1 beef bouillon cube
  • 2 cups tomato sauce
  • 2 dried bay leaves
  • 4 tbsp butter
  • 4 tbsp flour
  • 3 cups milk, heated
  • 220g cheese, finely grated
  • Salt and pepper to taste
Baked Mac Recipe
Baked Mac Recipe

Procedure:

To make the tomato meat sauce:

  • Saute garlic, onions and bell peppers in oil for up to five minutes until fragrant.
  • Add in the ground beef and cook until it is evenly browned, then stir in the beef cube.
  • Pour in the tomato sauce, stir and bring to a boil.
  • Season with salt and pepper.
  • Toss in the bay leaves, and allow to simmer for five minutes, then remove from heat and set aside.

To make the cheese sauce:

  • Melt the butter in a saucepan.
  • Stir in the flour and cook for about two minutes until a paste forms.
  • Pour in the milk and stir constantly until the flour paste is fully dissolved.
  • Add in the cheese while continuing to stir until the cheese has melted and blended into the mixture, then remove from heat.

To assemble and bake:

  • Pre-heat the oven to 375 deg F (190 deg C).
  • Divide the meat sauce in half.
  • Mix in the cooked macaroni to half of the meat mixture.
  • Coat the bottom of the baking pan with a thin layer of cheese sauce.
  • Add a layer of macaroni, then meat sauce and top with another layer cheese sauce. Repeat the three layers if the baking pan can accommodate.
  • Make sure the top is covered by a thick layer of cheese sauce.
  • Cover the baking pan with aluminum foil.
  • Bake with the foil cover for 15 minutes, and without the foil cover for another ten minutes.
  • Remove from the oven and serve.
Baked Mac Recipe
Baked Mac Recipe

Try this recipe for your Noche Buena spread or your New Year’s Eve feast.

Enjoy and let me know what you think!

Gear up for cooking.

La Germania Electric Thermostat Oven
La Germania Range FS5031 21XR oven

Stock up on ingredients.

Jelly’s Picks
Del Monte Salad Macaroni 1kg
Jelly’s Picks
Del Monte Tomato Sauce Original Style 1KG
Jelly’s Picks
Dari Creme Classic 200g
Jelly’s Picks
Jolly Cow Pure Fresh Milk 1Lx3
Jelly’s Picks
Eden Filled Cheese 165G/160G

Kimchi Musubi with Bibimbud, the original kimchi sauce

The sheer amount of time we’ve spent watching K-dramas have surely developed our craving for Korean flavors. Admittedly, the sight of our favorite idols feasting on Korean food got us craving for it too.

Korean cuisine is known for the layering of tastes and textures such that there’s an explosion of flavors in every mouthful.

One of K-cuisine’s hallmark dishes is kimchi. This traditional side dish is made with salted and fermented vegetables and flavored with a variety of seasonings and aromatics such as chili powder, spring onions, garlic and salted seafood, resulting in complex blend of sour, spicy and umami.

Kimchi is ever-present in Korean food culture that you would be hard-pressed to find a Korean meal without it.

Every Samgyeop, Tomas Morato
Kimchi

That certainly held true for Koreans Steve Song and David Seo, two buddies living abroad who embraced local cuisines but found something missing in their foodie adventures. Deciding to add a taste of home to their meals, they developed a kimchi-style condiment that’s uniquely blended to complement and add that crave-worthy kimchi flavor to practically any dish.

They named their creation Bibimbud, the Original Kimchi Sauce.

Bibimbud
Bibimbud

Made by people who absolutely love kimchi, Bibimbud is packed full with the flavor and goodness of kimchi with no preservatives. The product underwent a natural fermentation process just like real kimchi which allows it to get better with age and keep for a longer period.

It also comes with the health benefits brought by real kimchi such as boosting and metabolism and improving blood circulation and gut health.

With these in mind, why not incorporate Bibimbud to any meal?

Check out this fusion of Korean and Japanese flavors in my version of Kimchi Spam Musubi, made possible by Bibimbud.

Bibimbud
Bibimbud

Spam Musubi is said to have originated in Hawaii during and post-World War II, when the Japanese-American locals incorporated the canned meat into their own cuisines.

The addition of Bibimbud to Spam Musubi gives a new dimension of flavor to this popular snack.

Bibimbud
Bibimbud

Ingredients:

  • 3 cups steamed rice, kept warm
  • 1 can Spam cut into eight slices
  • Teriyaki sauce made with 1 tbsp sugar dissolved in 2 tbsp light soy sauce
  • 3 eggs, whisked until homogenous
  • 2 tbsp rice vinegar
  • 1 tbsp roasted sesame seeds
  • 2 nori sheets, each sheet cut into 4 strips of equal width
  • 2 tbsp Bibimbud, The Original Kimchi Sauce

Procedure:

  • Mix one tablespoon of the teriyaki sauce to the eggs.
  • Place a lightly oiled frying pan over medium to low heat. Add the eggs, cover and let cook for five minutes. When the top is set, slide the eggs onto a cutting board, the two sides into the middle making three layers then cut into eight strips of equal width.
  • Fry the Spam in a non-stick pan over high heat for five to seven minutes until crispy on both sides. When cooked, place the Spam pieces on a paper towel to drain off excess oil. Using the same pan, cook the remaining teriyaki sauce over medium heat. When it begins to thicken, add back the Spam to coat both sides of pieces with sauce.
  • Mix the Bibimbud, sesame seeds and rice vinegar into the rice and divide the mixture into eight equal portions. Press one portion into your musubi mold. (You can use the empty Spam can as a musubi mold by lining the bottom and inner sides with plastic wrap.)
  • Layer an egg strip on top of the rice then top with a piece of Spam. Press the layers against the mold until firm.
  • Wrap the molded musubi in a strip of nori. Seal the end of the nori strip with a bit of water.
  • Serve and enjoy!
Bibimbud

Bibimbud may also be used in flavoring Kimchi Fried Rice, Kimchi Pasta, Bibimbap, Korean-style Fried Chicken and more. For more details about Bibimbud and to check out recipes, visit bibimbud.com.

Given that Bibimbud is in a sauce form, it is easy to adjust the kimchi taste in the food, whether mild to suit newbies, or more intense to suit connoisseurs of Korean cuisine.

So the next time we go on a K-drama binge, we know we can easily have a taste of the flavors our K-idols are enjoying, thanks to Bibimbud!

Bibimbud is available at Lazada in 250-gram packs for Php175/pack.

Disclosure: A product sample was by Bibimbud.

Secrets to making the perfect steak dinner from Saab Magalona-Bacarro and La Germania

There’s nothing like enjoying a delicious steak dinner to mark special occasions. While it may not be advisable to dine out and have this juicy classic in your favorite restaurant just yet, the good news is that you can cook this dish right in the comfort and safety of your home!

​Actress and musician Saab Magalona-Bacarro, alongside her husband, businessman and Cheats frontman Jim Bacarro, make it a point to still hold romantic date nights with some good ol’ steak and mashed potatoes. “We enjoy preparing steak and potatoes because it’s delicious, hearty, and fancier than our usual meals, but also really easy to prepare,” Saab shared. Aside from having steak on date nights, they even repurpose them into steak fried rice for their kids.

In the first episode of La Germania’s recent Masterclass Series, the famous couple shared their secrets to making this dish at home. While you can watch the full episode on La Germania’s Facebook page to see how they prepare this classic dish, here’s the recipe you can try at home:

Ingredients:

Steak
● 500g rib eye steak
● Salt
● Pepper
● Butter
● Garlic
● Thyme

Mashed Potatoes
● Potatoes (5 large potatoes)
● 250ml Cream
● Beef cube
● Butter
● Parmesan Cheese
● Parsley
● Olive oil
● Stevia
● Cayenne pepper
● Paprika

Procedure:

  1. Make sure your steak is at room temperature for at least 10 minutes.
  2. Season the tray or cutting board first. 30% of the seasoning disappears when you cook beef, so make sure you season liberally. Then, rub both sides of the beef on the tray.
  3. Season the beef again until it looks encrusted in seasoning.
  4. Put the stove at a low temperature before putting the meat. The meat must be cooked in piping hot heat, so you have to be ready.
  5. Meanwhile, you cut the potatoes, and boil them for about 12 minutes. Use a fork to check how soft the potatoes are. Then, you mash the potatoes.
  6. Deglaze the pan with some red wine if you want some sauce alongside your steak.
  7. Put butter gradually on your potatoes. Taste test the potatoes so you can gauge how much seasoning you need to after.
  8. Once you season the potatoes to your preference, you can add some garlic.
  9. Fry some garlic with half a tablespoon of olive oil on low heat. Then add the cream, beef cube, and herbs of your choice.
  10. Put the sauce on the potatoes using a strainer. Add the garlic chunks if you would like. Then, put it back on the stove. Mix it around, and taste test if it’s seasoned according to your liking.
  11. If you like your steak medium, you should cook your steak for 4 minutes on each side. Leave it to cool down for about ten minutes, and enjoy immediately.

​For Saab and Jim, it’s not just about the way you cook your steak and potatoes. The secret is to use the best ingredients and invest in good quality kitchen equipment like La Germania. “With our La Germania stove, we can speed up the process of cooking our favorite dishes because it has multiple burners. It’s easy to control, and child-friendly too since it’s an induction stove,” Saab mused. “If you’re raising a small family like us, having a reliable kitchen partner like La Germania makes everything easier to manage. From everyday dishes to more elaborate recipes, we can have fun and experiment in the kitchen.”

Built according to the highest European standards in terms of construction and design, La Germania appliances allow you to prepare restaurant-worthy dishes in an efficient and easy way. With guaranteed durability and superior quality, they’re a good investment for you to channel your inner chef, and unleash your kitchen genius.

La Germania Steak Dinner
Saab and Jim Bacarro preparing their steak dinner.

Check out my La Germania Wish List on Lazada!

La Germania products are available online through La Germania’s official e-commerce website http://www.lagermaniaph.com and e-commerce platforms on Shopee and Lazada. For more information on La Germania and its products, you may follow the official Facebook and Instagram accounts of the trusted kitchen and appliance brand.

ABOUT LA GERMANIA
Italian-heritage brand La Germania has been the preferred kitchen companion of Filipino homemakers for 53 years and counting. Its wide array of ovens, cooktops, and stoves is made of high-grade materials and designed to stand the test of time and extensive use. La Germania’s current line of products continues to serve the cooking needs and lifestyle of this generation and the next. To know more about La Germania and its products, visit http://www.lagermaniaph.com. The trusted kitchen partner of Filipinos also has its official stores on Shopee and Lazada.

Recipe and details provided in a recent press release.