La Germania shares how to recreate your favorite dishes from Cibo, Yabu and other beloved restaurants

Have you ever wondered what it’s like to cook like your favorite chefs? Participants had the opportunity to learn how to cook like the pro’s themselves during the Cooking with La Germania: Masterclass Series, a five-part installment of virtual cooking classes held in partnership with celebrities and chefs from renown restaurants all over Metro Manila. 

In the webinar series, expert instructors guided viewers through the step-by-step process of how to cook their signature dishes, disclosing their tips and tricks along the way. Attendees also had the opportunity to interact with the chefs, who assisted them throughout the process. 

Among the impressive lineup were award-winning restaurateur Chef Margarita Forés, celebrity chef Rolando Laudico of Chef Guevarra’s and OK Cafe, and Chef Lee Jose from the Standard Hospitality Group which manages Yabu and Ippudo. In case you missed out on the unforgettable series, worry not! La Germania is here today to share some of the recipes behind your favorite restaurants’ signature dishes, and advice from our top chefs.

Not your typical pancake

Chef Lee Jose
Okonomiyaki

There’s more to Japanese cuisine than ramen and sushi. Chef Lee Jose, Executive Chef of popular Japanese restaurant chains Yabu and Ippudo, demonstrated how to make the savory version of Japanese pancake, Okonomiyaki. Not only is it an easy and filling recipe, but it’s sure to wow your friends and family! It’s best if you shop at a Japanese grocery store before you try this recipe, as a lot of ingredients won’t be found in your usual supermarket. 

Ingredients:

Okonomiyaki Batter

  • ¾ cups of water
  • 1 tsp Honodashi powder
  • 1 cup all purpose flour
  • ⅛ tsp iodized salt
  • ¼ tsp sugar
  • ½ tsp baking powder
  • 4 large eggs
  • 4 cups of cabbage
  • ½ cup of tenkasu (tempura flakes)
  • 1 tbsp Benishoga (pickled ginger)
  • Regular sliced bacon
  • 4 tbsp spring onions
  • 4 tbsp canola oil

Okonomiyaki Sauce

  • 1 ½ tbsp white sugar 
  • ⅛ tsp salt 
  • 3 ½ tbsp Worcestershire sauce 
  • 4 tbsp tomato ketchup 
  • 2 tbsp Oyster sauce 

Assembly

  • 1 tbsp cooking oil 
  • 1 cup Okonomiyaki batter 
  • 3 slices regular sliced bacon
  • 2 tbsp Onomiyaki sauce 
  • 1 tsp Aonori powder
  • 2 tbsp Japanese mayonnaise
  • Bonito flakes
  • 1 tsp Spring onions

Procedure:

  1. Prepare the Okonomiyaki batter by chopping the cabbage into 1/2″ chunks. Do not use the hard core. In a mixing bowl, add water and hondashi powder and whisk to dissolve the hondashi powder. Add the rest of the dry ingredients (flour, salt, sugar and baking powder). Whisk until the batter is smooth, then add the eggs and whisk until fully incorporated in the batter. Add the chopped Cabbage, Tempura flakes, Pickled Ginger and Spring onions. You can also add whatever fillings you desire (mushrooms, ham, pre cooked seafood, etc.) Using a rubber spatula, fold the batter until every ingredient is coated. Cover and keep chilled until ready to cook. This recipe yields 4 portions. 
  2. For the Okonomiyaki sauce, put all ingredients in a bowl and mix until all the sugar has dissolved. Keep in an airtight container and set aside. Keep chilled. 
  3. Heat up a non-stick pan and add 1 tbsp of oil on medium heat. When the pan is hot, scoop 1 cup of batter and add to the middle of the pan. Using your rubber spatula, gently level out the batter, then cover and let the batter cook a bit for 2 minutes. 
  4. Remove the cover and lay down 3 slices of bacon on top of the pancake. Cover and cook for 1 minute more, then gently flip the pancake and turn the heat to low. Cover and cook for another 3 minutes, then test for doneness by sticking a knife or chopsticks in the middle of the pancake to test if it’s fully cooked. If the stick or knife comes out clean, it’s cooked.
  5. Spread 1-2 tbsp of okonomiyaki sauce on top of the pancake and spread out evenly. Sprinkle the aonori (seaweed powder) and drizzle the Japanese mayonnaise. Top the pancake with bonito flakes & spring onions. Serve right away.

Elevate your breakfast favorites

Chef Lau
Longrilog

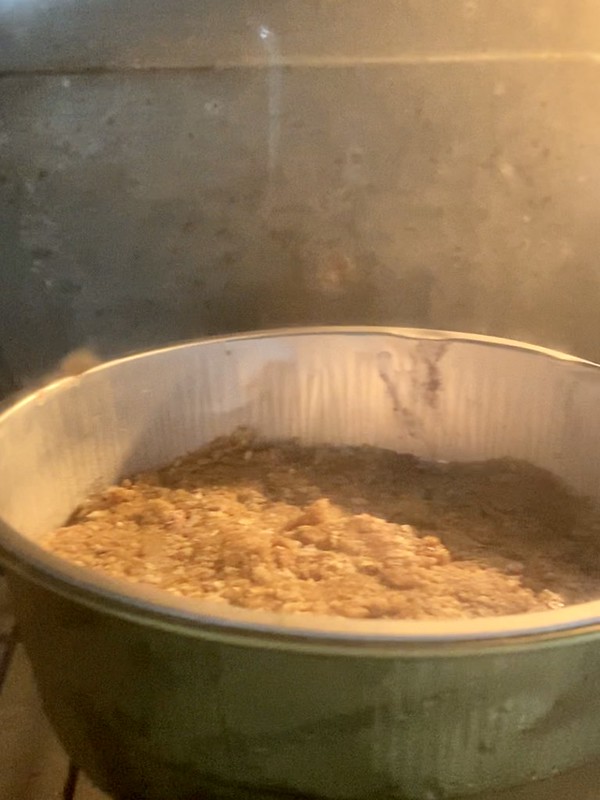
You may be an expert in making meatballs, but have you tried Longanisa meatballs? Chef Rolando Laudico of Chef Laudico Guevarra’s and OK Cafe taught the audience his secret to making his elevated version of Filipino breakfast classic Longsilog, better known as “Long-Ri-Long”, which is Longanisa meatball on creamy garlic salted egg risotto, poached eggs and oven dried tomatoes. 

Ingredients:

Longanisa Meatballs

  • 500g longanisa ground meat
  • Half cup small white onion, diced
  • 2 tbsps fresh basil, chopped 
  • 2 tbsps fresh Italian parsley
  • Half cup grated parmesan cheese
  • 1 whole egg, beaten
  • 1 cup bread crumbs
  • Half cup milk 
  • 4 tbsps extra virgin olive oil 

Creamy garlic salted egg risotto

  • 1 cup risotto rice (arborio or any short grain rice)
  • 2 tbsps butter
  • 1 head of garlic, minced
  • 1L chicken stock
  • 1 cup of cream
  • 2 salter eggs, chopped fine
  • Sea salt and freshly ground pepper, to taste 

Oven dried tomatoes

  • 6 whole tomatoes, halved
  • Sea salt and freshly ground pepper, to taste
  • Extra virgin olive oil, to drizzle

Poached eggs

  • 4 eggs
  • Sea salt
  • 4 cups of water 

Procedure:

  1. To make the longganisa meat balls, begin by mixing bread crumbs and milk together in a cup and let milk absorb for 5 minutes. In a big bowl, take out fresh longganisa meat from the casing (discard casing) and mix all other ingredients together. Refrigerate for 30 minutes to an hour. Form into meatballs and fry using a non-stick pan with 4 tablespoons of olive oil until brown. Place in a sheet pan and bake in the oven at 175C for 10-15 minutes or until meatballs are fully cooked. 
  2. To make the risotto, heat butter in a saucepan on medium high heat and add minced garlic. Saute for 2 minutes or until garlic is golden in color, then add risotto rice or sticky rice and cook for 2 minutes. Add chicken stock 1 cup at a time and gently stir until liquid has been totally absorbed. Repeat the process until the rice is cooked. Rice should be a bit al dente. Add more stock if needed depending on the type of rice used. Finally, add cream and finely chopped salted egg then cook for another 2-3 minutes. Garnish with fresh herbs like Italian parsley.
  3. For the tomatoes, slice them in half then season with sea salt and pepper. Bake in a 175C oven for 15 to 20 minutes or until tomatoes have dried a bit. 
  4. For the poached eggs, add water in a small cup then add a pinch or two of sea salt. Break the whole egg and add to the cup being careful not to break the yolks. Place the cup in a microwave for 45 seconds to a minute depending on the power of the microwave. Spoon out poached egg on a paper towel to absorb excess liquid. Repeat the process to the other 4 eggs. 
  5. For assembly, on a platter or plate, spread salted egg garlic risotto then top with longanisa meatballs, oven dried tomatoes, poached eggs and garnish with fresh herbs.

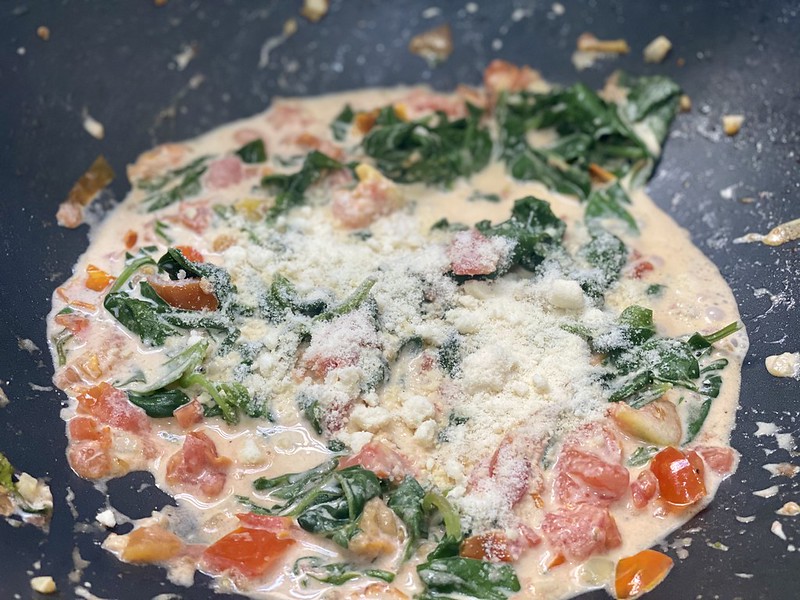
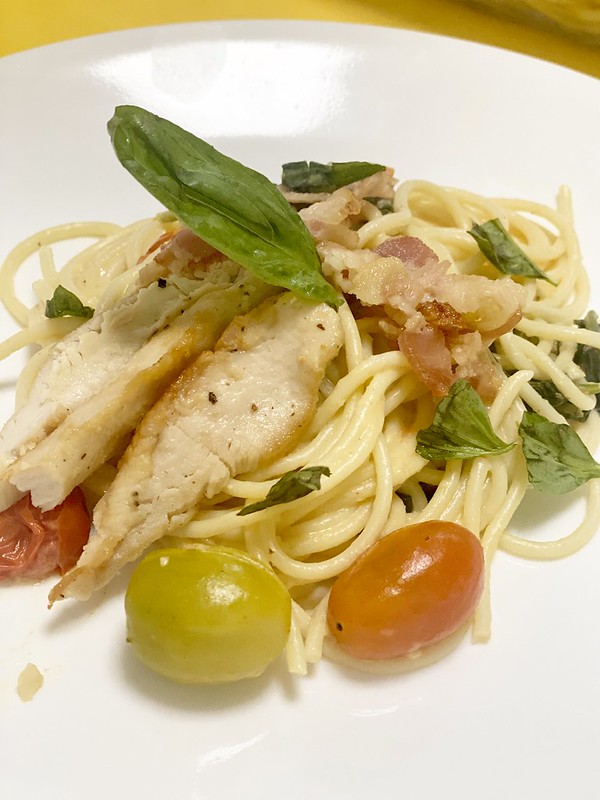
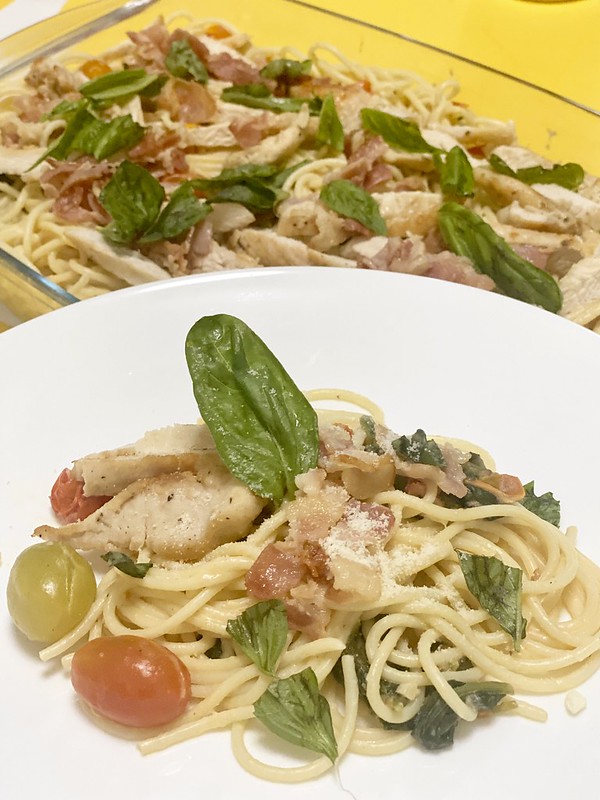
Satisfying your Italian craving

Chef Margarita Fores
Penne al Telefono

While the recipe behind Cibo’s famous Penne al Telefono will remain a secret (revealed exclusively to the attendees of the Masterclass series), here are some of Chef Margarita Forés biggest do’s and don’ts when it comes to cooking the perfect pasta. 

For one, the quality of your ingredients and the way they were manufactured makes a world of a difference when it comes to the richness and flavor of your meal! This is why you need to choose your ingredients carefully, and understand the science behind how they were made and how they react to other ingredients. For instance, Cibo recommends using pasta from the brand “De Cecco”, which uses a bronze pasta shaper that creates more porous noodles, allowing sauces to cling to the pasta better. 

For Margarita’s biggest don’ts, do not check for doneness by throwing your pasta against a wall and expecting it to stick. This means that your pasta is overcooked! Furthermore, do not run your freshly cooked pasta under cold water, as this removes all the flavor. Remember that pasta water is your best friend, and is a vital ingredient to the flavor of your pasta. 

When preparing these mouthwatering dishes, it’s important to choose the best ingredients and to use good quality kitchen equipment like La Germania. Built according to the highest European standards in terms of construction and design, La Germania appliances allow you to prepare restaurant-worthy dishes in an efficient and easy way. With guaranteed durability and superior quality, they’re a good investment for you to channel your inner chef, and unleash your kitchen genius.

Check out my La Germania Wish List on Lazada!

La Germania products are available online through La Germania’s official e-commerce website www.lagermaniaph.com and e-commerce platforms on Shopee and Lazada. For more information on La Germania and its products, you may follow the official Facebook and Instagram accounts of the trusted kitchen and appliance brand.

ABOUT LA GERMANIA

Italian-heritage brand La Germania has been the preferred kitchen companion of Filipino homemakers for 53 years and counting. Its wide array of ovens, cooktops, and stoves is made of high-grade materials and designed to stand the test of time and extensive use. La Germania’s current line of products continues to serve the cooking needs and lifestyle of this generation and the next. To know more about La Germania and its products, visit www.lagermaniaph.com. The trusted kitchen partner of Filipinos also has its official stores on Shopee and Lazada.

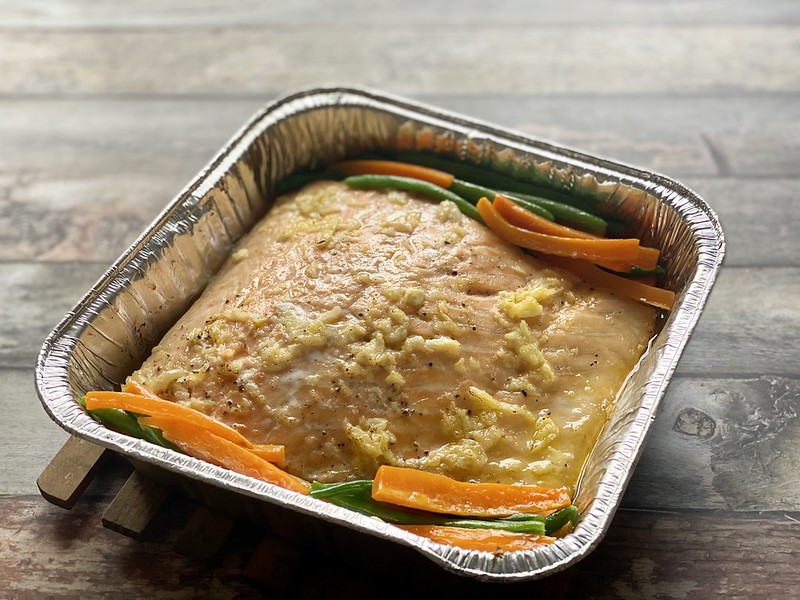
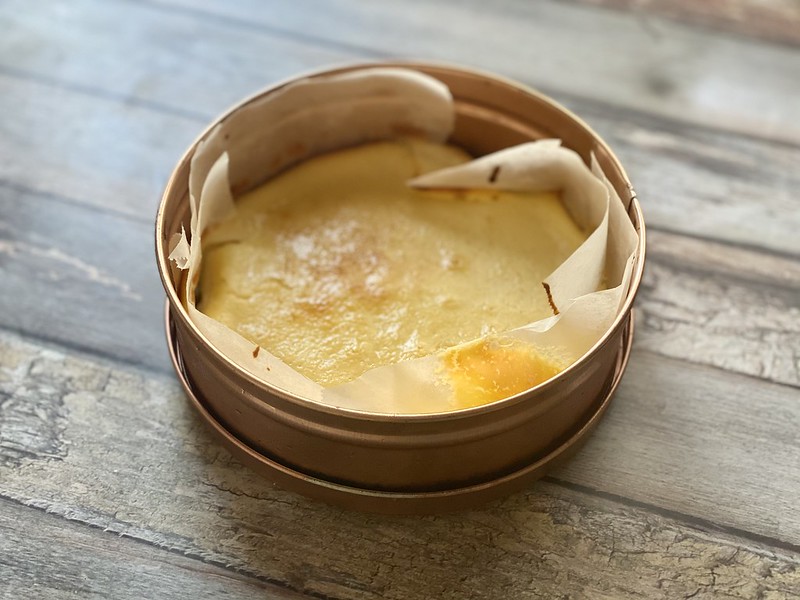
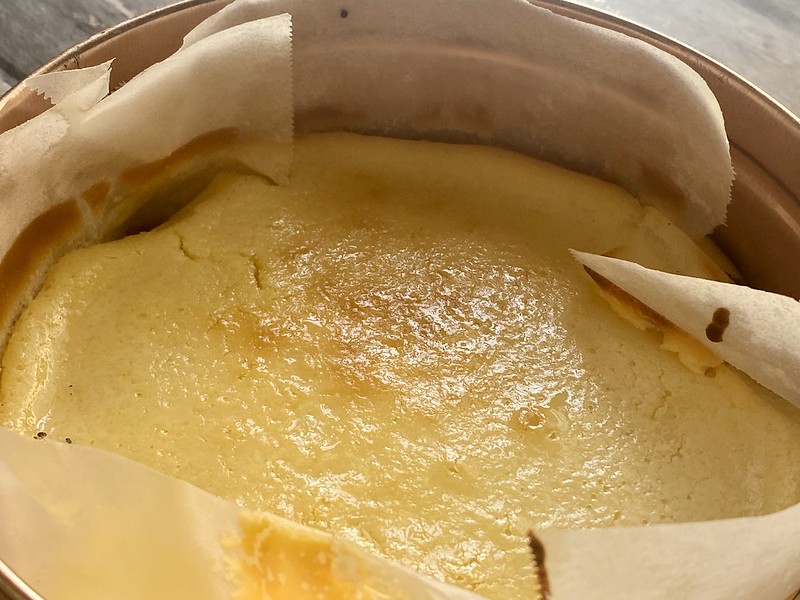
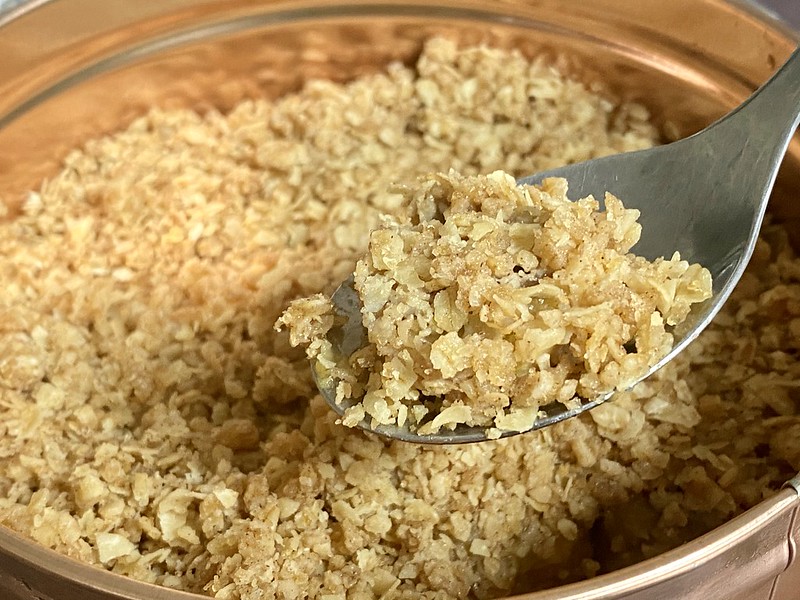
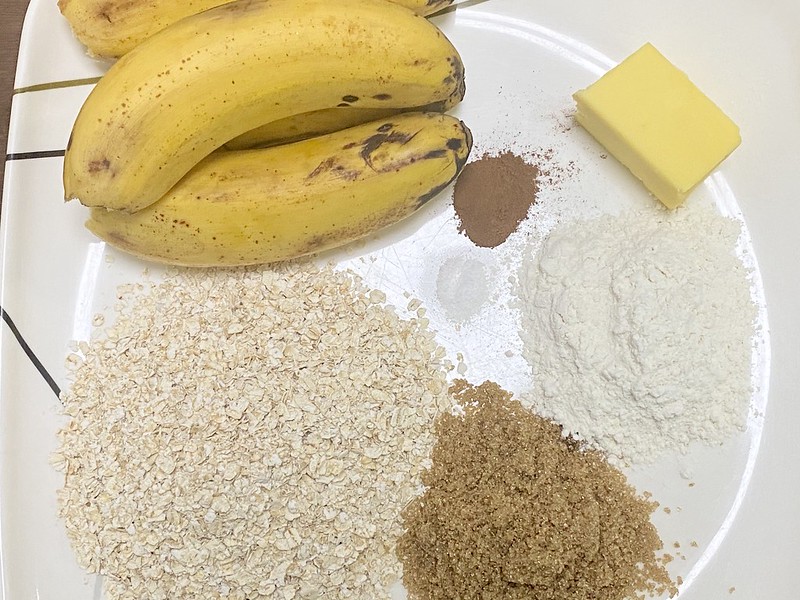
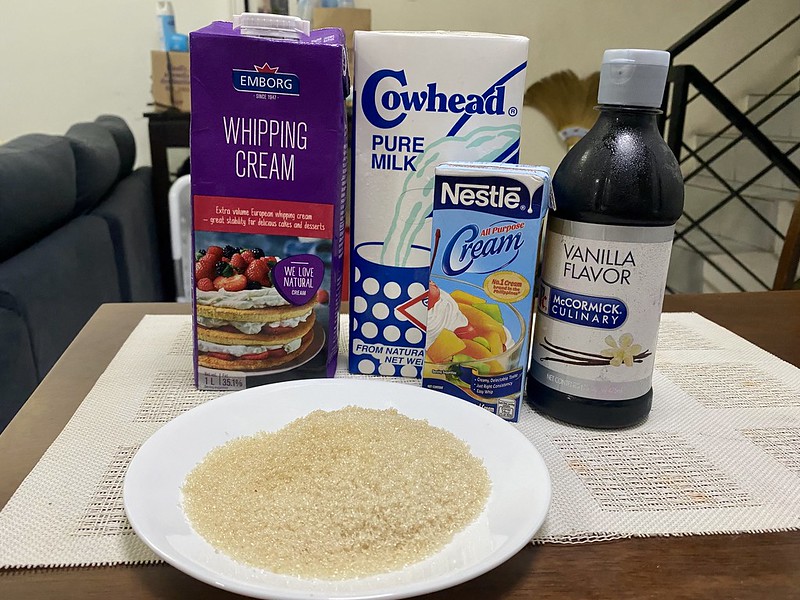
Photos of the chefs and dishes provided by La Germania in a recent press release.

Photo by Yente Van Eynde from Pexels

#QuarantineCookbook: Triple Berry Crumble

As a busy mom with a sweet tooth, I’m sometimes torn between decadent desserts that satisfy my sweet cravings and nourishing ones that contribute to the fam’s health.

The solution to this dilemma is a happy balance between the two extremes: a tasty dessert made with wholesome ingredients.

And if the dish happens to be very easy to make, then so much the better, right?

Well, with the frozen mixed berries from Ate Ceres Grocer, I was able to whip up a Triple Berry Crumble in a jiffy.

Triple Berry Crumble

Triple Berry Crumble

Triple Berry Crumble

Ate Ceres Grocer is a Caloocan-based enterprise that offers a selection of plant-based food. It’s frozen mixed berries, made up of strawberries, blueberries and raspberries, are available at Php190 per 500 grams.

Triple Berry Crumble

Triple Berry Crumble

Triple Berry Crumble

Mixed berries became a pantry staple in my household as Hubby and I like to make smoothies for snacking on or for post-workout drinks, considering their myriad health benefits. They are considered superfood as they are loaded with antioxidants, fiber, vitamins and minerals, as well as helps in controlling inflammation, cholesterol levels and heart health.

Triple Berry Crumble

Triple Berry Crumble

Frozen mixed berries have the additional benefits of being readily available and convenient to store. As they are frozen immediately upon harvest, they retain their nutrients present at their peak of freshness.

Triple Berry Crumble

Triple Berry Crumble

By making a Triple Berry Crumble, the fam and I don’t just get a delicious dessert but also a lot of wholesome goodness.

Ingredients:

Berry filling:

  • 1/4k (half a tray) of Ate Ceres Grocer’s mixed frozen berries
  • 1 1/2 tbsp granulated sugar
  • 1 1/2 tbsp all purpose flour
  • zest from 1/2 lemon
  • pinch of salt

Crumble topping:

  • 1/2 cup old fashioned rolled oats
  • 1/4 cup brown sugar
  • 3 tbsp all purpose flour
  • 1/4 cup cold butter, cut into small cubes

Procedure:

Toss all the berry filling ingredients together in a mixing bowl until well combined.

Triple Berry Crumble

In a separate mixing bowl, combine all the crumble topping ingredients, mashing the butter into the rest of the ingredients until well incorporated.

Triple Berry Crumble

Spread the berry mixture evenly into a 6-inch pie plate then cover with the crumble topping.

Triple Berry Crumble

Triple Berry Crumble

Bake in a pre-heated oven at 175 deg C for 45 minutes until the berry filling bubbles and the topping turns golden brown.

Triple Berry Crumble

Serve slightly warm, topped with a few dollops of homemade vanilla ice cream.

Triple Berry Crumble

Triple Berry Crumble

Triple Berry Crumble

Want to try this recipe? Order your frozen mixed berries from Ate Ceres Grocer on Facebook or Instagram.

Looking for other easy-to-cook dishes to try out? Check out my other kitchen adventures:

Recipe: Tuscan Chicken Pasta

It’s around that time of the month when the stocked food in my fridge are beginning to run low and all I’ve got to work with for the fam’s lunch are a couple of frozen chicken breasts, some strips of bacon and pantry staples such as pasta and parmesan cheese.

Plus, I’m coming in from a late morning Zoom meeting (the bane of work-from-home moms, am I right?) and I’ve barely got enough time to prepare a meal, eat with the family and make it to my afternoon meetings.

Hmmm… what can I possibly whip up quickly and easily during my lunch hour?

Luckily, this recipe for Tuscan Chicken Pasta came to my rescue.

Tuscan Chicken Pasta

What I love about this is that it made use of the remaining frozen food as well as incorporated wholesome and fresh produce that made for a hearty and tasty meal for the family. Also, I didn’t have to use a lot of utensils to cook the dish; it’s basically a one-skillet recipe. (However, I made use of Hubby’s trusty wok as it gave me a sizable surface area to cook in and it distributed the heat quite well. I hope the wok purists won’t come after me!)

Check it out!

Ingredients:

  • 1/2 kilo spaghetti noodles, cooked per package instructions (reserve 1 cup of the water these were boiled in)
  • 1 tbsp extra virgin olive oil
  • 2 boneless and skinless chicken breasts, thawed and filleted into 4 flat pieces
  • salt to taste (I used Himalayan sea salt from Goodness MNL but you can use ordinary table salt)
  • freshly ground black pepper to taste
  • 10 slices of bacon cut into short strips
  • 2 cloves garlic, minced
  • 4 to 6 fresh tomatoes, diced
  • 1/4 kilo Baguio spinach
  • 1/2 c heavy cream
  • 1/4 c grated parmesan
  • 6 basil leaves for garnish

Procedure:

Heat olive oil in a large skillet over high heat. After seasoning the chicken breast fillets with salt and pepper, fry them for 7 to 8 minutes on each side until golden brown. Remove them from heat and allow them to rest for 10 minutes before slicing them into thin strips.

Tuscan Chicken Pasta

Using the same skillet, fry the bacon pieces over medium heat for 8 minutes or until they reach your desired crispiness. (I prefer my bacon to be fried just enough to curl up but not be too crispy). Drop them on a plate lined with a paper towel to drain them of excess oil. Set aside.

Tuscan Chicken Pasta

Again, using the same skillet, pour out half the fat from cooking the chicken and the bacon before sautéing the garlic and tomatoes over medium heat.

Tuscan Chicken Pasta

Add the spinach and cook for two minutes until the leaves are slightly wilted.

Tuscan Chicken Pasta

Season with salt and pepper prior to adding the heavy cream, parmesan and half of the reserved pasta water. Allow to simmer for 5 minutes then remove from heat. (If the sauce becomes to thick, stir in some more of the pasta water).

Tuscan Chicken Pasta

Toss the cooked pasta in sauce until well coated, then toss the chicken and bacon strips until evenly distributed.

Tuscan Chicken Pasta

Garnish with freshly torn basil leaves before serving.

Tuscan Chicken Pasta

Try this recipe and let me know how it goes!

Tuscan Chicken Pasta

Tuscan Chicken Pasta

Tuscan Chicken Pasta

Looking for other easy-to-cook dishes to try out? Check out my other kitchen adventures:

Guilt-free recipes made with Mega Tuna

One of the more benign, even beneficial, effects of the quarantine is the renewed interest in home cooking.

In the earlier days of the lockdown, with dining out prohibited and food delivery options quite limited, the metro’s denizens took stock of their pantry and set about creating their culinary masterpieces with ingredients they have on hand.

Guess what’s invariably present in Pinoy kitchen cabinets. Canned tuna!

Tuna is one of the most eaten fish in the world. It can be eaten fresh – either raw or cooked – as well as canned, which involves pre-cooking. In the Philippines, canned tune may be available in several variants such as in oil, in water, in flakes, hot and spicy, Spanish-style or corned, among others.

Mega Tuna Recipes

Mega Tuna Recipes

Canned tuna lends itself well to home cooking. It is flavorful enough to appeal to the palate (it can even be eaten straight out of the can) yet flexible to be applied to many dishes from canapes and salads to pastas. Canned tuna is also healthier than meat, generally having lower levels of saturated and trans fats as well as higher levels of omega 3 fatty acids compared to beef.

Mega Tuna Recipes

Mega Tuna Recipes

In a Zoom event hosted by Mega Tuna last December, brand ambassador Chef JP Anglo of Sarsa Kitchen shared some new recipes made with Mega Tuna that can form part of the holiday spread.

Mega Tuna Recipes

Mega Tuna Recipes

Check them out:

Tuna Arroz Caldo

Ingredients:

  • Mega Tuna Spanish Style
  • 350g white or brown rice
  • 150g chicharon
  • 20g fresh garlic
  • 50g ginger
  • 30g fried garlic
  • 30g spring onion
  • 5g black pepper
  • 20ml patis
  • 4pcs calamansi

Procedure:

In a pot, pour the oil from the can of Mega Tuna Flakes in Spanish Style, then saute the ginger and garlic.

Add a liter of water and cooked rice, and cook for twenty to thirty minutes.

Pour the arroz caldo in a bowl, add the Mega Tuna and top with spring onions, fried garlic, chicharon and black pepper.

Season with patis.

Mega Tuna Recipes

Mega Tuna Recipes

Tuna Soba Noodles

Ingredients:

  • Mega Tuna Sweet and Spicy
  • 500g soba noodles
  • 30ml sesame oil
  • 20g sesame seeds
  • 60ml oyster sauce
  • 5g salt
  • 3pc fried eggs
  • Chili garlic (optional)

Procedure:

Cook soba noodles in hot water (make sure not to overcook them).

Toss all ingredients with the noodles and add half of the tuna and half of the oil from the can to flavor the noodles.

Pour the mixture into a bowl and top with the remaining tuna, fried garlic, spring onions and fried egg.

Mega Tuna Recipes

Mega Tuna Recipes

I was able to try these delicious dishes since I received a box containing these dishes as well as Mega Tuna’s four variants: in Oil, Spanish Style, Sweet and Spicy and Hot and Spicy.

Mega Tuna Recipes

Mega Tuna Recipes

Mega Tuna Recipes

Mega Tuna Recipes

Hubby found the Mega Tuna variants well-suited to his midnight snacking.

The holidays may be over but we can carry over these recipes into the new year as we continue to create delectable viands from our kitchen staples such as Mega Tuna.

Mega Tuna is available in leading supermarkets and grocery stores as well as in Shopee and Lazada.

Recipe: Baked Salmon in Lemon Butter Sauce

Just like that: 2020 is no more and we’re off to welcome a brand new year!

Guess what: I embraced 2021 with a new recipe for baked salmon for the fam’s Media Noche feast.

This past Christmas Eve, as I’ve done for several past Christmas Eves, I whipped up my tried-and-tested Cheesy Baked Salmon for our Noche Buena feast. It’s certainly a family favorite and even my friends have been trying it out for their own holiday feasts.

However, I opted to do something different for the fam’s Media Noche feast. This time around, at Hubby’s suggestion, I decided to go a ease up a bit on the cheese but go heavy on the butter. And the result is awesome.

Baked Salmon in Lemon Butter Sauce

Baked Salmon in Lemon Butter Sauce

So here it is: check out my recipe for Baked Salmon in Lemon Butter Sauce.

Ingredients:

  • 1 salmon fillet (600 grams or more)
  • 1/3 cup unsalted butter
  • 5 cloves of garlic, finely minced
  • 4 tablespoons lemon juice
  • 8 thin slices of lemon
  • 1 teaspoon honey
  • Salt and pepper to taste
  • French beans and carrot strips, blanched and lightly stir-fried in butter

Procedure:

Thaw salmon and pat dry.

Rub half of the minced garlic over the fillets. Pour three-fourths of the lemon juice over the salmon, then set the fillet aside for ten minutes to allow the salmon to marinate.

Preheat the oven to 190 deg C (375 deg F).

Arrange the lemon slices at the bottom of an aluminum baking pan.

Remove the salmon from the marinade, scraping off excess garlic, and place the fillets skin-side down on a on top of the lemon slices. Set aside.

Baked Salmon in Lemon Butter Sauce

Place the butter in a microwave-safe bowl and place it in the microwave for one minute to melt the butter.

Whisk in the remaining one-fourth of the lemon juice, the honey and the remaining half of the minced garlic into the melted butter.

Season the fillets with salt (I used Himalayan sea salt from Goodness MNL for its health benefits but ordinary table salt will do) and freshly ground black pepper.

Spoon three-fourths of the butter mixture onto the salmon fillets and reserve the rest of the remaining mixture.

Cover the salmon with a sheet of aluminum foil then seal the fillets by crimping the ends together with the pan to produce an air-tight cover for the fillets.

Place the baking pan in the oven and allow the salmon to bake for 17 minutes.

Baked Salmon in Lemon Butter Sauce

Take out the baking sheet from the oven and remove the top cover. Spoon the remaining butter mixture over the salmon pieces then allow the salmon to broil for five to ten minutes until the salmon fillets turn golden.

Baked Salmon in Lemon Butter Sauce

Serve with the buttered French beans and carrot sticks.

Baked Salmon in Lemon Butter Sauce

Baked Salmon in Lemon Butter Sauce

I’m glad to note that this dish has my Hubby and kiddos’ seal of approval in terms of taste and texture. Hubby even prefers it to the Cheesy Baked Salmon.

Baked Salmon in Lemon Butter Sauce

Baked Salmon in Lemon Butter Sauce

My compromise is to go for the Cheesy Baked Salmon for Noche Buena as its richness will be well-suited for it being the central dish. For Media Noche, wherein it will be one of many dishes atop a traditionally overflowing table, the simpler buttery version will be more appropriate.

Baked Salmon in Lemon Butter Sauce

Baked Salmon in Lemon Butter Sauce

Try this recipe and let me know how it goes!

Looking for other easy-to-cook dishes to try out? Check out my other kitchen adventures:

#QuarantineCookbook: Basque Burnt Cheesecake Cups

One of the food items that trended during quarantine is the Basque Burnt Cheesecake.

An adaptation of tarta de queso which was popularized by the cafe La Viña located in San Sebastian in the Basque region of northern Spain, it is characterized by its parchment paper wrapping, scorched top that dips into a gooey, almost molten-like, center.

I had my first taste of Burnt Basque Cheesecake last year during lunch with my officemates at Sourdough Cafe and again this year when I had a whole cake delivered to my home from Sweet Samthings for my birthday celebration.

Sourdough Cafe, Tomas Morato

Sweet Samthings

What I love about it is the buttery caramel-like taste of the top layer that gives way to the rich tanginess of the cheesecake filling.

Basque Burnt Cheesecake

Basque Burnt Cheesecake

Basque Burnt Cheesecake

This decadent dessert makes use of easily accessible ingredients: cream cheese (of course!), sugar, eggs, flour and cream.

Basque Burnt Cheesecake

I’m considering giving some away as gifts to family and friends so I decided to try making this dessert as mini cups.

Basque Burnt Cheesecake

Basque Burnt Cheesecake

Basque Burnt Cheesecake

I also used fresh cage-free eggs for this recipe. This type of eggs are grown in farms that provides environments that allow egg-laying hens to exhibit their natural behaviors unlike those with battery-cage systems which provide no space for the hens to stretch their wings, perch, or forage. Cage-free eggs have been found to be of higher quality and have a healthier nutritional profile than other eggs such as less saturated fat and cholesterol, higher levels of protein, vitamins and omega fatty acids. You can read more about the virtues of cage-free eggs here.

Basque Burnt Cheesecake

Basque Burnt Cheesecake

Basque Burnt Cheesecake

Ingredients:

  • Two 225g bars of cream cheese
  • One cup granulated sugar
  • Three cage-free eggs
  • Two-and-half tablespoons all purpose flour
  • One-eight teaspoon of salt
  • One cup whipping cream
  • One-fourth teaspoon melted butter

Procedure:

Preheat the oven to 250 deg C.

Using a mixer on medium speed, soften the cream cheese for three minutes then add the sugar until well combined.

Add in the eggs one at a time and beat for a minute until the mixture is smooth. Scrape down the sides of the bowl, add the salt and continue to beat for another minute until the ingredients are well incorporated into the mixture. Set aside.

Place the flour in a separate bowl and whisk in the whipping cream a little at a time, making sure that there are no flour lumps.

Pour the cream mixture into the cheese mixture while mixing at slow speed.

Line the cups of two muffin pans with cupcake liners (or you can use two square pieces of parchment papers placed on top of each other such that the corners alternate with each other). Brush the liners with a bit of melted butter.

Fill the cups two-thirds of the way, then bake for thirteen to fifteen minutes until the tops are slightly scorched (I prefer that over totally burnt) and the centers are still wobbly.

Remove from the oven and allow to cool up to ten minutes to allow the cakes to set.

Serve slightly warm or at room temperature.

I was able to make twenty-four mini cakes and one (thin!) cake in an eight-inch round tin.

Basque Burnt Cheesecake

Basque Burnt Cheesecake

Basque Burnt Cheesecake

These cakes have my kiddos seal of approval, and my mom’s as well, as I sent the tin cake over to her as a present.

So if you’re on the lookout for something new to bring to your Noche Buena table, or to give away as gifts to your nears-and-dears, do give this recipe a try.

Basque Burnt Cheesecake

Looking for other easy-to-cook dishes to try out while in quarantine? Check out my other kitchen adventures:

#QuarantineCookbook: Easy Mac ‘n Cheese

Last Sunday morning, in a bid to stop me from buying a mass-produced mac ‘n cheese packet when we went grocery shopping (or probably to flex his cooking muscles yet again!), Hubby promised me that he would make some macaroni and cheese for me and the kids.

Fast-forward to the afternoon of the same day, my Significant Other is bustling about in the kitchen (in between watching scenes from his latest Korean drama binge-fest) to make what was arguably my daughter #ExhibitA’s favorite macaroni dish.

Easy Mac ‘n Cheese

Macaroni and Cheese (affectionately called Mac ‘n Cheese by its aficionados) is a dish of cooked macaroni pasta in cheese sauce (normally cheddar). Traditionally, this dish is baked in an oven as a casserole but it may also be prepared on a stove using a saucepan. Or you can just add water to a packaged mix and zap it in the microwave.

Easy Mac ‘n Cheese

Similar dishes have been around in Europe since the 14th century. Since then, Mac ‘n Cheese have grown in worldwide popularity, even being considered comfort food in the US.

In his valiant effort to provide the fam with a filling snack that Sunday afternoon, Hubby improvised on an existing Mac ‘n Cheese recipe he found online.

Ingredients:

2 cups of uncooked macaroni
4 cups of milk
2 cups shredded cheddar cheese
1/4 cup parmesan
1/4 cup grated processed cheese
2 tbsp butter

Procedure:

In a large pot, bring the milk to a boil.

Add the macaroni into the pot, stirring constantly for about ten minutes until the pasta is al dente.  The milk would have been greatly reduced by then.

Turn off the heat, add in the cheddar and mix well.

Then add butter, parmesan and grated cheese.  Season with salt and pepper to taste.

Serve while hot.

I love how milky and creamy this pasta dish is. And, well, Hubby’s version is way better than the packaged mix. 🙂

Easy Mac ‘n Cheese

Easy Mac ‘n Cheese

Try this recipe out the next time you want a yummy snack or appetizer, or when you need to contribute something hearty to a family potluck and let me know what you think.

Easy Mac ‘n Cheese

Looking for other easy-to-cook dishes to try out while in quarantine? Check out my other kitchen adventures:


#QuarantineCookbook: Easy Banana Crisp

Sure, banana breads has become more popular lately as newly minted home bakers have tried their hands on making this ubiquitous pastry.

Well, how about another sweet incarnation of banana as a dessert, say a banana crisp?

Banana Crisp

A crisp is a dish of baked fresh fruit with a streusel topping that typically includes oats. As the dish bakes, the oats will crisp up, adding another level of texture to the dessert, hence the name.

Banana Crisp

Unlike banana breads that require overripe fruit, banana crisps need the bananas to be just ripe.

This is a makeshift banana crisp recipe that I improvised with ingredients that I already have on hand when I was struck with one of my cravings for something sweet again.

Check it out:

Ingredients:

Banana Crisp

  • 4 bananas sliced into thin circles
  • 1/4 cup all purpose flour
  • 1/4 cup brown sugar
  • 1 cup instant oats (my substitute for rolled oats)
  • 1/2 tsp cinnamon
  • 1/8 tsp salt
  • 4 tbsp butter, softened

Procedure:

To make the topping,combine the flour, sugar, oats, cinnamon and salt a medium bowl. Add in the softened butter and work the mixture with your hands or a whisk until crumbly. Set aside.

Evenly distribute the banana slices into two cake tins. Cut up some of the bananas to fill in the smaller spaces in between slices.

Sprinkle the topping mixture over the bananas, enough to cover the fruit.

Place inside the oven pre-heated at 205 deg C (400 deg F) and bake for ten to twelve minutes until the topping becomes firm and gets a golden brown color.

Serve while still warm from the oven.

Banana Crisp

Banana Crisp

Enjoy as is or topped with vanilla ice cream (see my recipe for Homemade Vanilla Ice Cream).

Banana Crisp

Banana Crisp

Banana Crisp

Banana Crisp

Try this recipe out and let me know what you think.

Looking for other easy-to-cook dishes to try out while in quarantine? Check out my other kitchen adventures:

#QuarantineCookbook: Homemade Vanilla Ice Cream

Hey, foodie!

Come on, let’s list the uses for vanilla ice cream!

  • A dessert on its own
  • A topping for dessert pies and crumbles
  • The thing that floats in a root beer float
  • The thing that makes milk shakes extra decadent
  • The thing that’s sandwiched when you typically make ice cream sandwiches

I’m sure there are lots more that good ole’ plain vanilla ice cream can contribute to the enjoyment of foodies everywhere.

Homemade Vanilla Ice Cream

Homemade Vanilla Ice Cream

Surprisingly, I’ve been having trouble finding vanilla ice cream in my neighborhood grocery and convenience stores the past few days. And with the modified enhanced community quarantine just around the corner, I can be sure that ice cream deliveries to these local stores will be delayed.

This is quite unfortunate as I have hankering for pies and shakes that include this treat.

Since necessity is the mother of invention, I decided to make vanilla ice cream myself.

Here’s how:

Homemade Vanilla Ice Cream

Ingredients:

  • 1 cup heavy cream
  • 1/2 cup milk + 1/2 cup all-purpose cream (my substitute for the 1 cup half-and-half that the original recipe called for)
  • 1/2 cup sugar
  • 1 tbsp vanilla

Procedure:

Combine the milk, all-purpose cream, sugar and vanilla in a bowl. Mix until well blended.

In a separate bowl, whip the heavy cream until it begins to double in volume or form stiff peaks.

Mix in the vanilla mixture until well combined.

Freeze overnight.

Now, I have vanilla ice cream ready to use for pies and milkshakes!

Homemade Vanilla Ice Cream

Homemade Vanilla Ice Cream

Try this recipe out for yourself!

Banana Crisp

Homemade Vanilla Ice Cream

Looking for other easy-to-cook dishes to try out while in quarantine? Check out my other kitchen adventures:

#QuarantineCookbook: Calamansi Muffins

It’s already the rainy season and the metro is still in the grips of the COVID-19 pandemic.

This is not the time to let up on our nutrition, especially Vitamin C. Also known as ascorbic acid, it is touted as one of the safest and most effective nutrients. Vitamin C can help in fortifying immune systems weakened by stress, preventing serious complications arising from cold, reducing the risk of stroke, as well managing skin aging.

How fortunate that we Pinoys are blessed with an abundance of ready sources of Vitamin C: the calamansi!

Pickfresh Calamansi Juice

But don’t hassle yourself juicing all those little fruits by hand. You can have concentrated calamansi juice by the bottle, thanks to Pickfresh.

Pickfresh Calamansi Concentrate is organic and all natural with no use of extenders or preservatives. Available variants include unsweetened (best for diabetics), sweetened (for the kids) and with honey.

Pickfresh Calamansi Juice

To make yourself a glass of refreshing calamansi juice, just stir in two to three parts water into one part of the concentrate, adjust to taste, then add ice. Each bottle of Pickfresh yields fifteen to twenty glasses of calamansi juice.

Pickfresh Calamansi Juice

Now, some people might not be too excited about drinking calamansi juice (it may be an acquired taste) but how about some calamansi muffins?

Pickfresh Calamansi Juice

Pickfresh Calamansi Juice

Fluffy, tangy and sweet, these little yummies are sure to get you eager for your dose of Vitamin C.

Pickfresh Calamansi Juice

Pickfresh Calamansi Juice

Here’s how you can whip ’em right up!

Ingredients:

  • 1/2 cup butter
  • 1 cup sugar
  • 2 eggs
  • 1 1/2 cup all purpose flour
  • 1 tsp baking powder
  • 1/5 tsp salt
  • 1/4 cup milk
  • 1/4 cup Pickfresh Sweetened Calamansi Concentrate

Procedure:

Combine flour, baking powder and salt in a medium bowl. Set aside.

Combine the milk and the calamani concentrate in another bowl. Set aside.

Cream the butter and sugar together for two to three minutes until well combined. Add in the eggs and mix well.

Add in the milk mixture and flour mixture, mixing until all ingredients are well-blended. For fluffy muffins, take care not to over-mix.

Scoop the mixture into paper-lined cupcake pans then bake in a preheated 350 deg F (170 deg C) oven for 18 to 23 minutes.

Feel free to enjoy your calamansi muffins, along with a glass of calamansi juice, as you relax while watching your favorite shows…

Pickfresh Calamansi Juice

Or when you take a snack break while working from home!

Pickfresh Calamansi Juice

To get your bottle of Pickfresh Calamansi Concentrate (Php180/liter), send a message via Facebook or Instagram. Online payments via BDO or BPI are accepted.

Pickfresh Calamansi Juice

Check out my blog posts on other small enterprises and startups in the food business: